Authentication and authorization using asp.net core web api and JWT (Part 01)
Application overview
Token based authentication has been the most popular authentication technique for the last couple of years. Before that we used session based authentication. In session based authentication, client saves session id in the cookie. In token-based authentication, token is given to client instead of session. This token contains encrypted information of user with expiry time. In this article, I will show you, how to create authentication application using asp.net core web api and JWT(Json Web Token).
Tools and Technology used
The following tools and technologies has been used for this application
- Visual Studio 2019
- Visual C#
- ASP.NET Core Web API
- Postman - for api testing
Let’s have a look to the implementation of the project.
Step 1: Create an asp.net core web api application
- Select File->New->Project->ASP.NET Core Web Application
- Choose project and solution name
- Click “Create” button
Step 2: Choose project template
- Select project template as API
- Click create button
Step 3: Install NuGet packages
- Install following nuget packages in the application
PM> Install-Package Microsoft.IdentityModel.Tokens
PM> Install-Package System.IdentityModel.Tokens.Jwt
PM> Install-Package Microsoft.AspNetCore.Authentication.JwtBearer -Version 3.1.11
Step 4: Add Key, Issuer and Audience
- Add Key, Issuer and Audience in Appsettings.json as follows
  "Jwt": {
    "Key": "thisisasecretkey",
    "Issuer": "Issuer.com",
    "Audience":  "Audience.com"
  }
Step 5: Add authentication in HTTP request pipeline
Add the following code snippet to add authentication in HTTP request pipeline.
  public void Configure(IApplicationBuilder app, IWebHostEnvironment env)
  {
      .
      .
      .
      // Configure for HTTP Request pipeline
      app.UseAuthentication();

      app.UseHttpsRedirection();

      app.UseRouting();

      app.UseAuthorization();

      app.UseEndpoints(endpoints =>
      {
          endpoints.MapControllers();
      });
  }
Step 6: Configure JWT based authentication
Register a JWT authentication schema by using “AddAuthentication” method in ConfigureService Method of Startup.cs as follows
  public void ConfigureServices(IServiceCollection services)
  {
      services.AddAuthentication(JwtBearerDefaults.AuthenticationScheme)
      .AddJwtBearer(options =>
      {
          options.TokenValidationParameters = new TokenValidationParameters
          {
              ValidateIssuer = true,
              ValidateAudience = true,
              ValidateLifetime = true,
              ValidateIssuerSigningKey = true,

              ValidIssuer = Configuration["Jwt:Issuer"],
              ValidAudience = Configuration["Jwt:Audience"],
              IssuerSigningKey = new SymmetricSecurityKey(Encoding.UTF8.GetBytes(Configuration["Jwt:Key"]))
          };
      });

      services.AddControllers();
  }
Step 7: Create a login view model
Create a view model name “LoginVM” in Model folder as follows
  public class LoginVM
  {
      public string UserName { get; set; }
      public string Password { get; set; }
  }
Step 8: Create an api controller
Create an api controller name AuthController as follows
    [Route("api/[controller]")]
    [ApiController]
    public class AuthController : ControllerBase
    {
        private IConfiguration _config;

        public AuthController(IConfiguration config)
        {
            _config = config;
        }

        [AllowAnonymous]
        [HttpPost, Route("login")]
        public IActionResult Login([FromBody] LoginVM loginModel)
        {
            if (loginModel == null)
            {
                return BadRequest("Invalid request");
            }

            if (IsLogin(loginModel.UserName, loginModel.Password))
            {
                var secretKey = new SymmetricSecurityKey(Encoding.UTF8.GetBytes(_config["Jwt:Key"]));
                var signinCredentials = new SigningCredentials(secretKey, SecurityAlgorithms.HmacSha256);
                var tokeOptions = new JwtSecurityToken(
                     issuer: _config["Jwt:Issuer"],
                     audience: _config["Jwt:Audience"],
                     claims: new List<Claim>(),
                     expires: DateTime.Now.AddMinutes(30),
                     signingCredentials: signinCredentials
                 );

                var tokenString = new JwtSecurityTokenHandler().WriteToken(tokeOptions);
                return Ok(new { Token = tokenString });
            }
            else
            {

                return Unauthorized();
            }


        }

        public bool IsLogin(string username, string password)
        {
            bool result = username == "mahedee" && password == "pass123" ? true : false;
            return result;
        }
    }
Step 9: Create a test api controller
- Create a test api controller name ValuesController as follows
- Add “Authorize” attribute on the ValuesController
  [Route("api/[controller]")]
  [ApiController]
  [Authorize]
  public class ValuesController : ControllerBase
  {
      // GET: api/<ValuesController>
      [HttpGet]
      public IEnumerable<string> Get()
      {
          return new string[] { "value1", "value2", "value3", "value4" };
      }
  }
Step 10: Run application and test using postman
- Run application
- Run postman
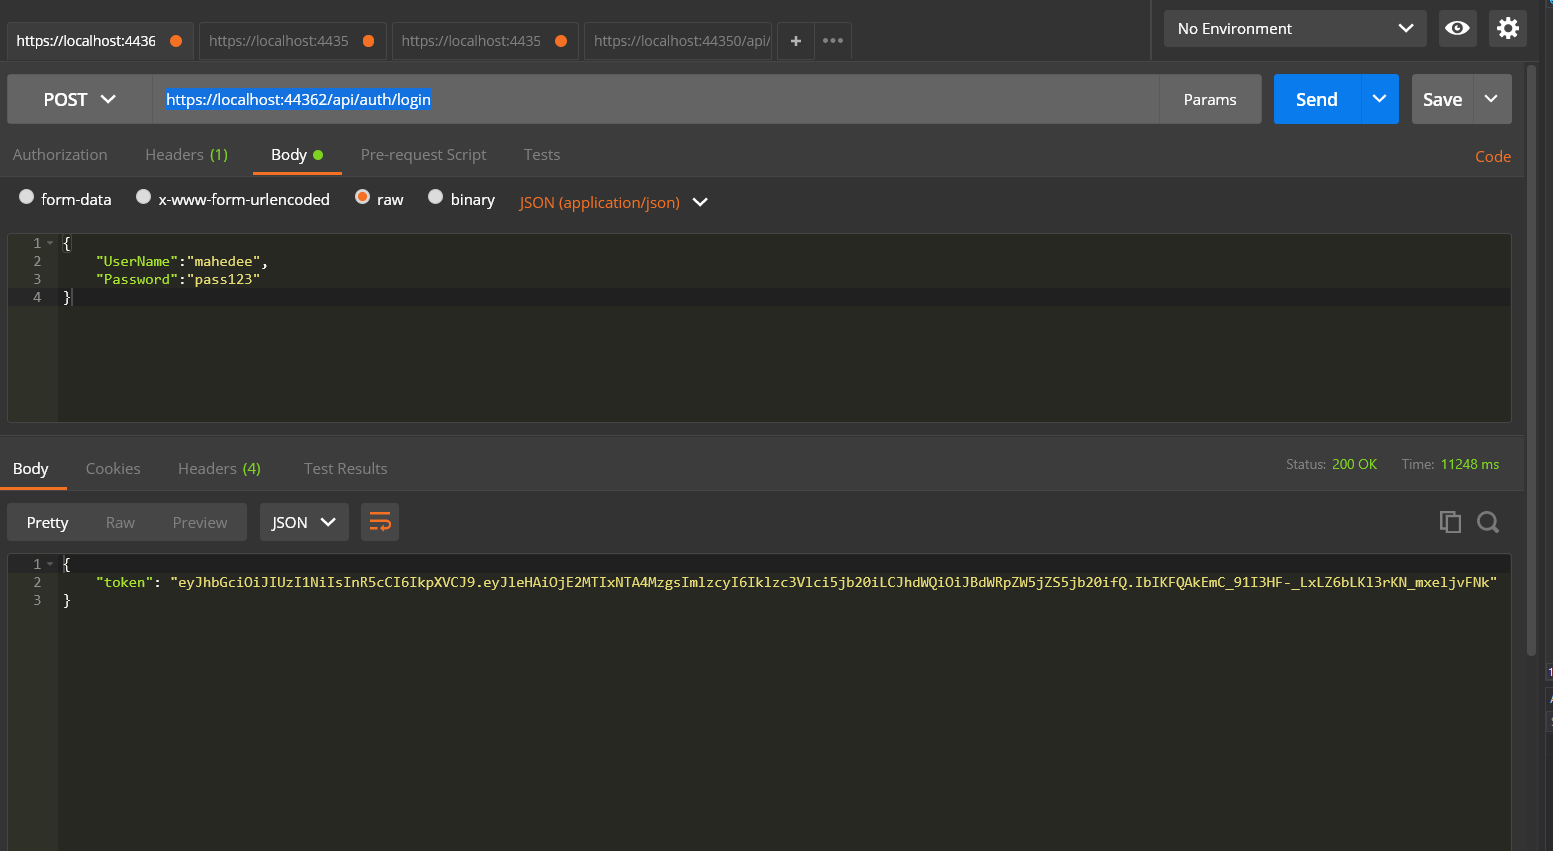
- In the Headers tab of postman, set Key as Content-Type and Value as application/json
- Set url as https://localhost:44362/api/auth/login and set POST method
- In the body tab select raw and JSON
- Now set userName and Password in the body of postman as follows
- Press send button and you will get the token as follows
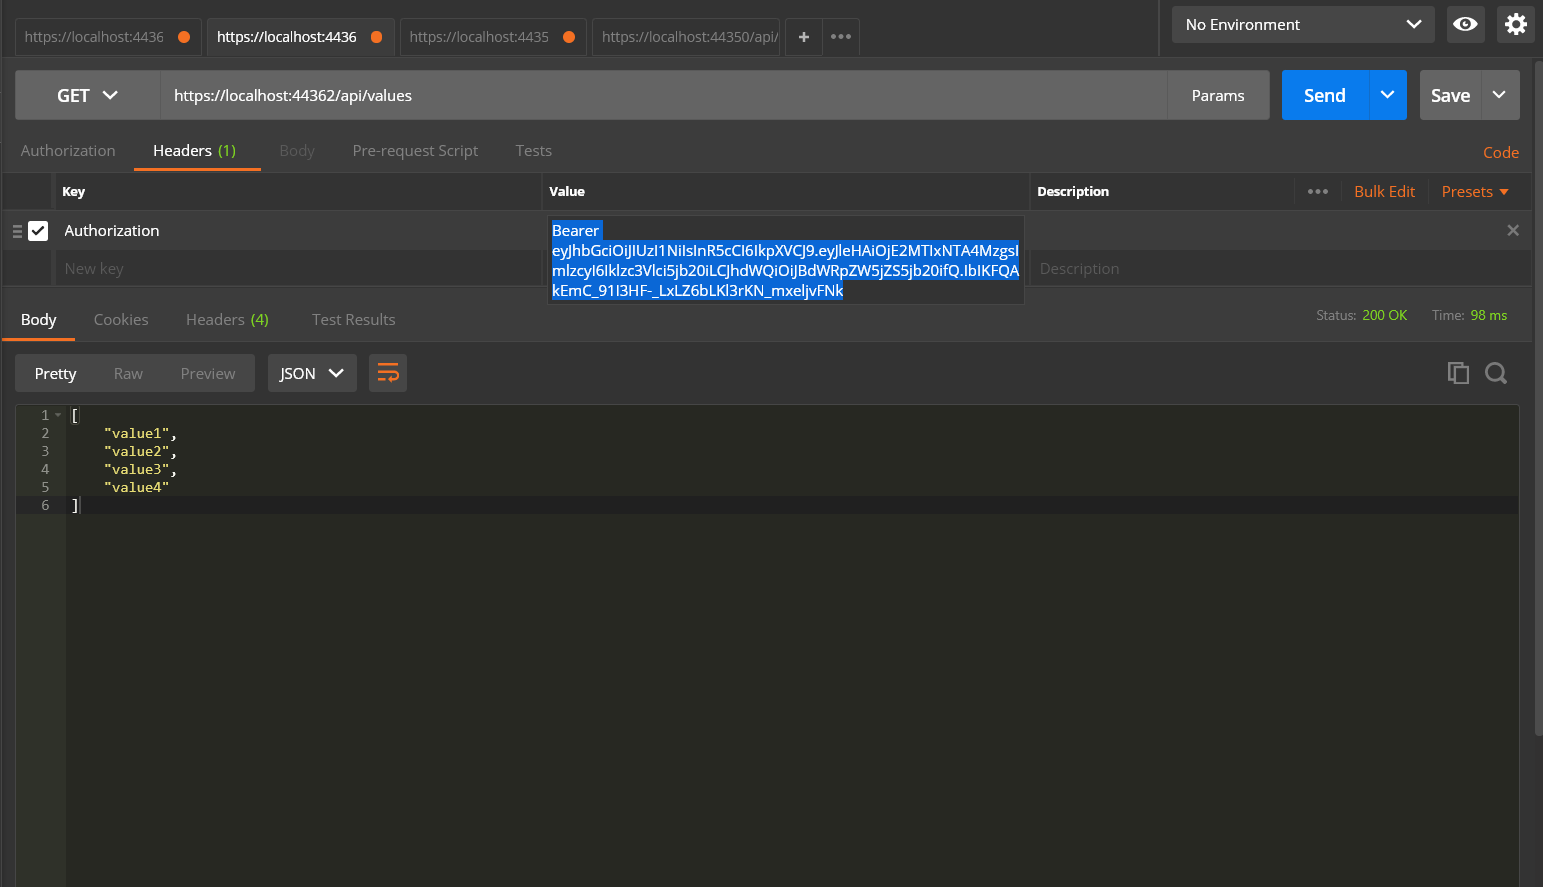
Step 11: Test your application using token
- Copy the token you have already got against user name and password
- In the header tab use Authorization and Bearer Token as follows
- Set url as https://localhost:44362/api/values
- Select GET method and click send button you will see the output