Dependency Injection Using Ninject In ASP.NET MVC
What is Dependency Injection?
In software engineering, dependency injection is a software design pattern that implements inversion of control for resolving dependencies. – Wikipedia. It makes software components are loosely coupled.
Advantages of Dependency Injection
- Flexibility to use alternative implementation of service.
- Configurable & easy to use
- Make system loosely couple
- Code becomes more reusable, testable, readable and manageable.
- Reduction of boilerplate code in the application objects
What is Ninject?
- Open Source Inversion of Control (IOC)
- It is a Dependency Injector for .NET created by Nate Kohari
- It’s very easy to use.
- Easily add from nuget.
- For more information visit Ninject.org
Let’s come to the implementation of DI using Ninject in ASP.NET MVC
Tools and Technology used
I used following tools and technology to develop the project –
- Visual Studio 2013
- Visual C#
- ASP.NET MVC 5
- Entity Framework 6
- Razor view engine
- Ninject for MVC5
Step 1: Create a ASP.net MVC Project
- From Visual studio 2013, choose File->Project
- Select MVC Template and click OK
Step 2: Create a model name Employee
Create a Model name Employee in model folder
public class Employee
{
    public int Id { get; set; }
    public string Name { get; set; }
    public string Designation { get; set; }
    public string Dept { get; set; }
    public string BloodGroup { get; set; }
}
Step 3: Change or Add Connection String
- Change or Add connection string in Web.config ```xml
__Step 4: Create a Context class__
* Create HRMContext Class in Repository folder.

```csharp
public class HRMContext : DbContext
{
    public HRMContext()
        : base("DefaultConnection")
    {
    }
    public DbSet < Employee > Employees { get; set; }
}
Step 5: Create Repository Interface and Concrete Class
- Create IEmployeeRepository Interface and EmployeeRepository class in Repository folder
public interface IEmployeeRepository : IDisposable
{
    IQueryable <Employee> All { get; }
    Employee Find(int? id);
    void InsertOrUpdate(Employee employee);
    void Delete(int id);
    void Save();
}


public class EmployeeRepository : IEmployeeRepository
{

    HRMContext context;
    public EmployeeRepository(HRMContext context)
    {
        this.context = context;
    }

    public IQueryable <Employee> All
    {
        get { return context.Employees; }
    }

    public Employee Find(int? id)
    {
        Employee objEmployee = new Employee();
        objEmployee = context.Employees.Where(p => p.Id == id).FirstOrDefault();
        return objEmployee;
    }

    public void InsertOrUpdate(Employee employee)
    {
        if (employee.Id == default(int))
        {
            // New entity
            context.Employees.Add(employee);
        }
        else
        {
            // Existing entity
            context.Entry(employee).State = System.Data.Entity.EntityState.Modified;
        }
    }

    public void Delete(int id)
    {
        var employee = context.Employees.Find(id);
        context.Employees.Remove(employee);
    }

    public void Save()
    {
        context.SaveChanges();
    }

    public void Dispose()
    {
        context.Dispose();
    }
}
Step 6: Install Ninject from nuget
- In nuget package manager search and install Ninject.MVC5
Step 7: Map Interface and Concrete class in Ninject
- Go to NinjectWebCommon file in App_Start folder. Add the following line for IEmployee Interface and Employee concrete class.
    public static class NinjectWebCommon
    {
        private static readonly Bootstrapper bootstrapper = new Bootstrapper();

        /// <summary>
        /// Starts the application
        /// </summary>
        public static void Start()
        {
            DynamicModuleUtility.RegisterModule(typeof(OnePerRequestHttpModule));
            DynamicModuleUtility.RegisterModule(typeof(NinjectHttpModule));
            bootstrapper.Initialize(CreateKernel);
        }

        /// <summary>
        /// Stops the application.
        /// </summary>
        public static void Stop()
        {
            bootstrapper.ShutDown();
        }

        /// <summary>
        /// Creates the kernel that will manage your application.
        /// </summary>
        /// <returns>The created kernel.</returns>
        private static IKernel CreateKernel()
        {
            var kernel = new StandardKernel();
            try
            {
                kernel.Bind<Func<IKernel>>().ToMethod(ctx => () => new Bootstrapper().Kernel);
                kernel.Bind<IHttpModule>().To<HttpApplicationInitializationHttpModule>();

                kernel.Bind<IEmployeeRepository>().To<EmployeeRepository>();

                RegisterServices(kernel);
                return kernel;
            }
            catch
            {
                kernel.Dispose();
                throw;
            }
        }

        /// <summary>
        /// Load your modules or register your services here!
        /// </summary>
        /// <param name="kernel">The kernel.</param>
        private static void RegisterServices(IKernel kernel)
        {
        }
    }
Step 8: Create Controller and Views
- Click Right button on Controller Folder->Add Controller.
- Choose its name as EmployeeController.
- Now choose scaffolding template - Web API 2 Controller with actions, using Entity Framework.
- After clicking Add button, Employee Controller and Corresponding actions and views will be created automatically.
Step 9: Modify the controller
- Modify the controller - use repository instead of context directly.
public class EmployeesController : Controller
{
    private readonly IEmployeeRepository repository;

    public EmployeesController(IEmployeeRepository objIrepository)
    {
        repository = objIrepository;
    }

    // GET: Employees
    public ActionResult Index()
    {
        return View(repository.All.ToList());
    }

    // GET: Employees/Details/5
    public ActionResult Details(int? id)
    {
        if (id == null)
        {
            return new HttpStatusCodeResult(HttpStatusCode.BadRequest);
        }
        Employee employee = repository.Find(id);
        if (employee == null)
        {
            return HttpNotFound();
        }
        return View(employee);
    }

    // GET: Employees/Create
    public ActionResult Create()
    {
        return View();
    }

    // POST: Employees/Create
    // To protect from overposting attacks, please enable the specific properties you want to bind to, for
    // more details see http://go.microsoft.com/fwlink/?LinkId=317598.
    [HttpPost]
    [ValidateAntiForgeryToken]
    public ActionResult Create([Bind(Include = "Id,Name,Designation,Dept,BloodGroup")] Employee employee)
    {
        if (ModelState.IsValid)
        {
            repository.InsertOrUpdate(employee);
            repository.Save();
            return RedirectToAction("Index");
        }

        return View(employee);
    }

    // GET: Employees/Edit/5
    public ActionResult Edit(int? id)
    {
        if (id == null)
        {
            return new HttpStatusCodeResult(HttpStatusCode.BadRequest);
        }
        Employee employee = repository.Find(id);
        if (employee == null)
        {
            return HttpNotFound();
        }
        return View(employee);
    }

    // POST: Employees/Edit/5
    // To protect from overposting attacks, please enable the specific properties you want to bind to, for
    // more details see http://go.microsoft.com/fwlink/?LinkId=317598.
    [HttpPost]
    [ValidateAntiForgeryToken]
    public ActionResult Edit([Bind(Include = "Id,Name,Designation,Dept,BloodGroup")] Employee employee)
    {
        if (ModelState.IsValid)
        {
            repository.InsertOrUpdate(employee);
            repository.Save();
            return RedirectToAction("Index");
        }
        return View(employee);
    }

    // GET: Employees/Delete/5
    public ActionResult Delete(int? id)
    {
        if (id == null)
        {
            return new HttpStatusCodeResult(HttpStatusCode.BadRequest);
        }
        Employee employee = repository.Find(id);
        if (employee == null)
        {
            return HttpNotFound();
        }
        return View(employee);
    }

    // POST: Employees/Delete/5
    [HttpPost, ActionName("Delete")]
    [ValidateAntiForgeryToken]
    public ActionResult DeleteConfirmed(int id)
    {
        repository.Delete(id);
        repository.Save();
        return RedirectToAction("Index");
    }

    protected override void Dispose(bool disposing)
    {
        if (disposing)
        {
            repository.Dispose();
        }
        base.Dispose(disposing);
    }
}
Step 10: Run command in Package Manager Console
- To find Package manager console go to Tool->NuGet Package Manager -> Package Manager Console
Now, run the following command one by one in Package Manager Console.
PM> Enable-Migrations -ContextTypeName HRMContext
PM> Add-Migration initialmigration
PM> Update-Database -Verbose
Step 11: Add a menu
- Add a menu name employee in _Layout.cshtml page to create a menu.
<ul class="nav navbar-nav">
    <li>@Html.ActionLink("Home", "Index", "Home")</li>
    <li>@Html.ActionLink("About", "About", "Home")</li>
    <li>@Html.ActionLink("Contact", "Contact", "Home")</li>
    <li>@Html.ActionLink("Employee", "Index", "Employees")</li>
</ul>
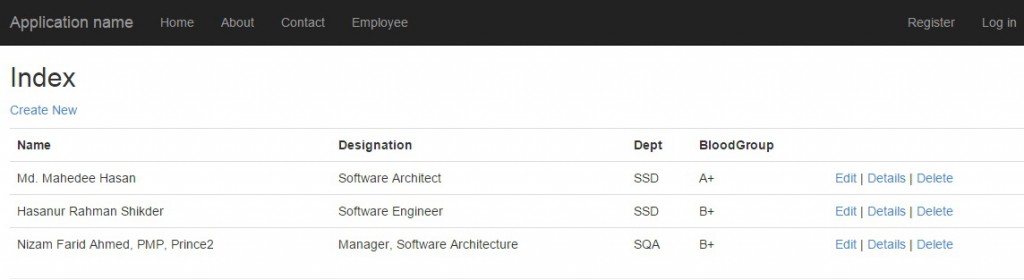
- Run the application and click “Employee” menu. Now you can create, delete, read update employee information.