
A Practical Guide to Comparing Local and Remote Git Changes
Introduction
In real-world software development, one mistake can easily slip into production—not because of bad code, but because changes were not reviewed properly before pushing.
Questions developers often ask themselves:
- What exactly did I change locally?
- How different is my branch from origin/main?
- Will my push override someone else’s work?
- What will actually go into my Pull Request?
If you’ve ever asked these questions, this article is for you.
In this guide, I’ll show you step by step how to compare your local changes with a remote branch, using both VS Code (visual) and Git commands (precise)—with real-world use cases you’ll face daily as a developer.
Why This Matters in Real Projects
Before jumping into commands and tools, let’s ground this in reality.
Real-World Scenarios
- You finished a feature and want to review changes before pushing
- You’re about to create a Pull Request
- Another teammate pushed changes and you want to check for conflicts early
- You want to make sure only intended files go into the commit In professional teams, checking differences against the remote branch is a must, not a nice-to-have.
Now, let’s start comparing local and remote Git changes effectively using practical tools and commands and real-world examples. In this I will use one of my github repository - https://github.com/mahedee/file-generator
Assuming you have cloned the repository and made some local changes.
Step 0: Always Fetch the Latest Remote Changes
Before comparing anything, make sure your local repo knows about the latest remote state.
git fetch origin
⚠️ Important:
- This updates remote references like origin/main
- It does not modify your local code
- Skipping this step is one of the most common Git mistakes.
Part 1: Comparing Changes Using VS Code (Visual Approach)
VS Code has excellent built-in Git support. No extra plugins are required. For best results, you can install the GitLens extension, but it’s optional.
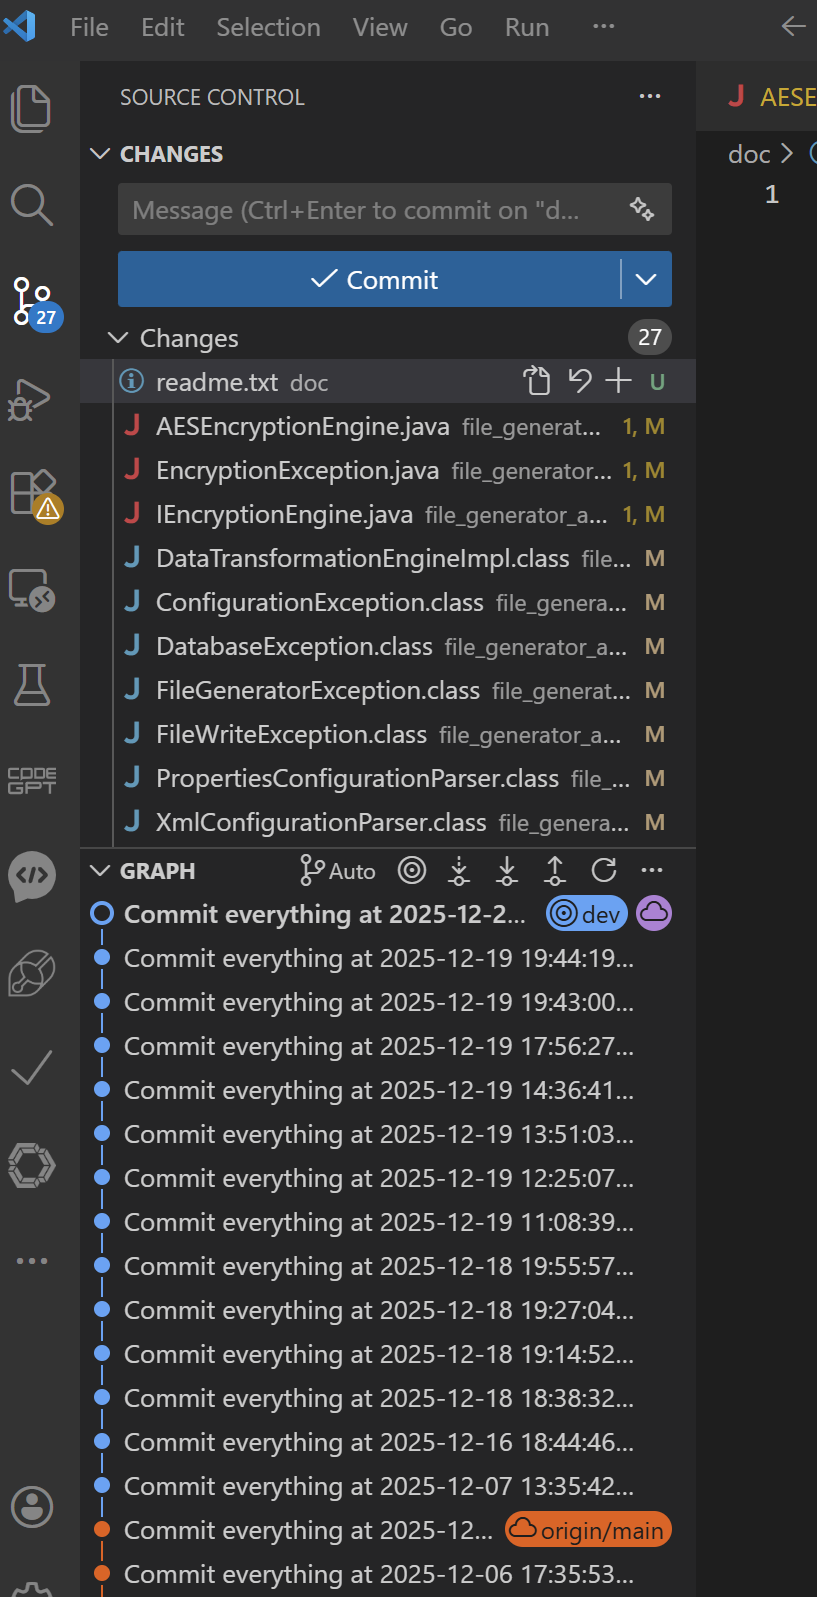
Step 1: Open Source Control
- Open VS Code in your project folder
- Open the Source Control panel: Go to View → Source Control
- Or, Shortcut: Ctrl + Shift + G
- Or, click the Source Control icon in the sidebar
You’ll immediately see:
- M → Modified files
- A → Added files
- D → Deleted files
This shows your local changes, but not yet compared to remote.
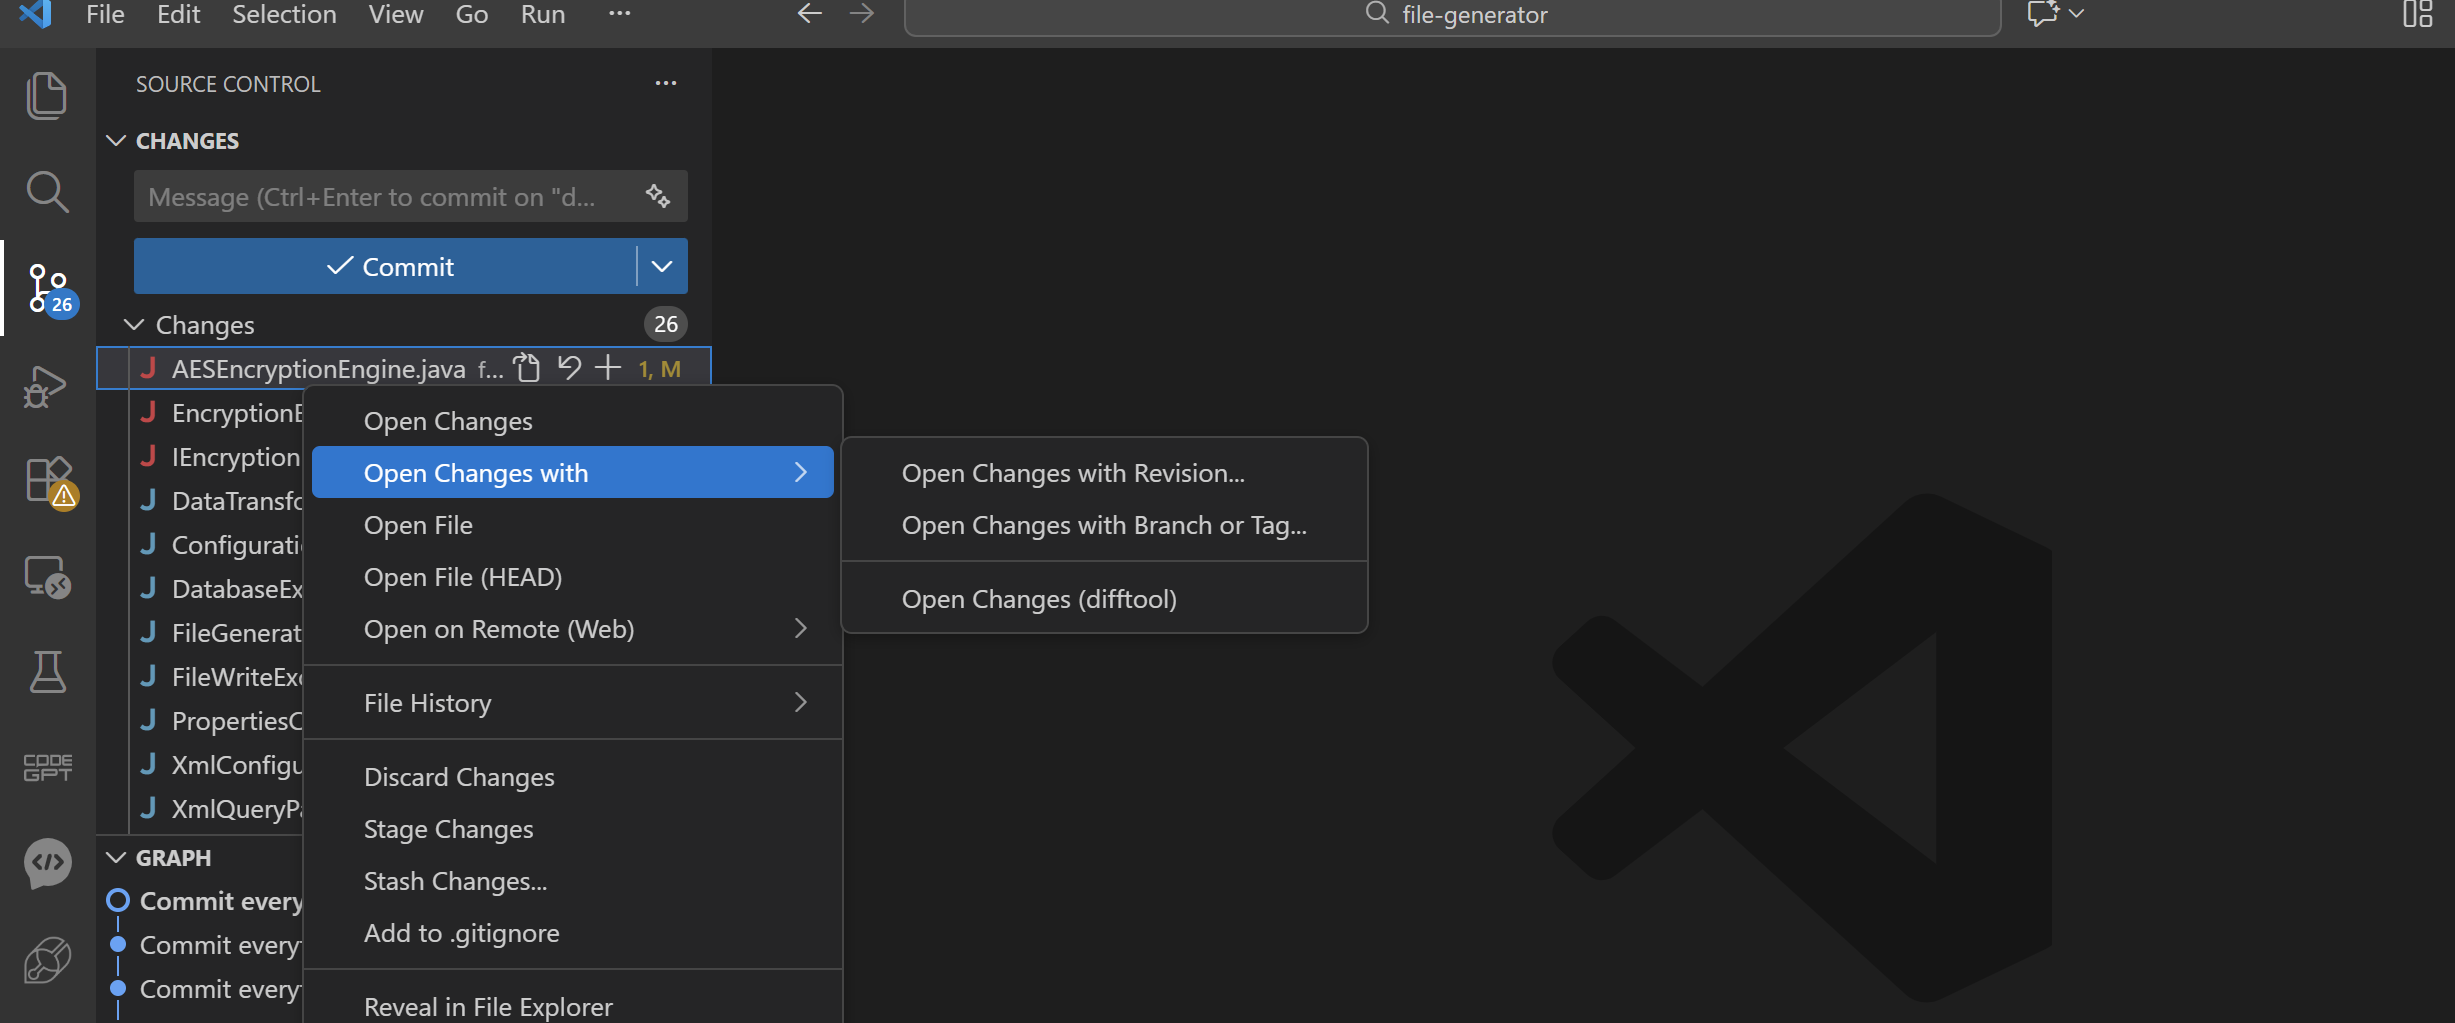
Step 2: Compare Local Branch with Remote Branch
- Right-click on a changed file
- Choose Open Changes or Open Changes with…
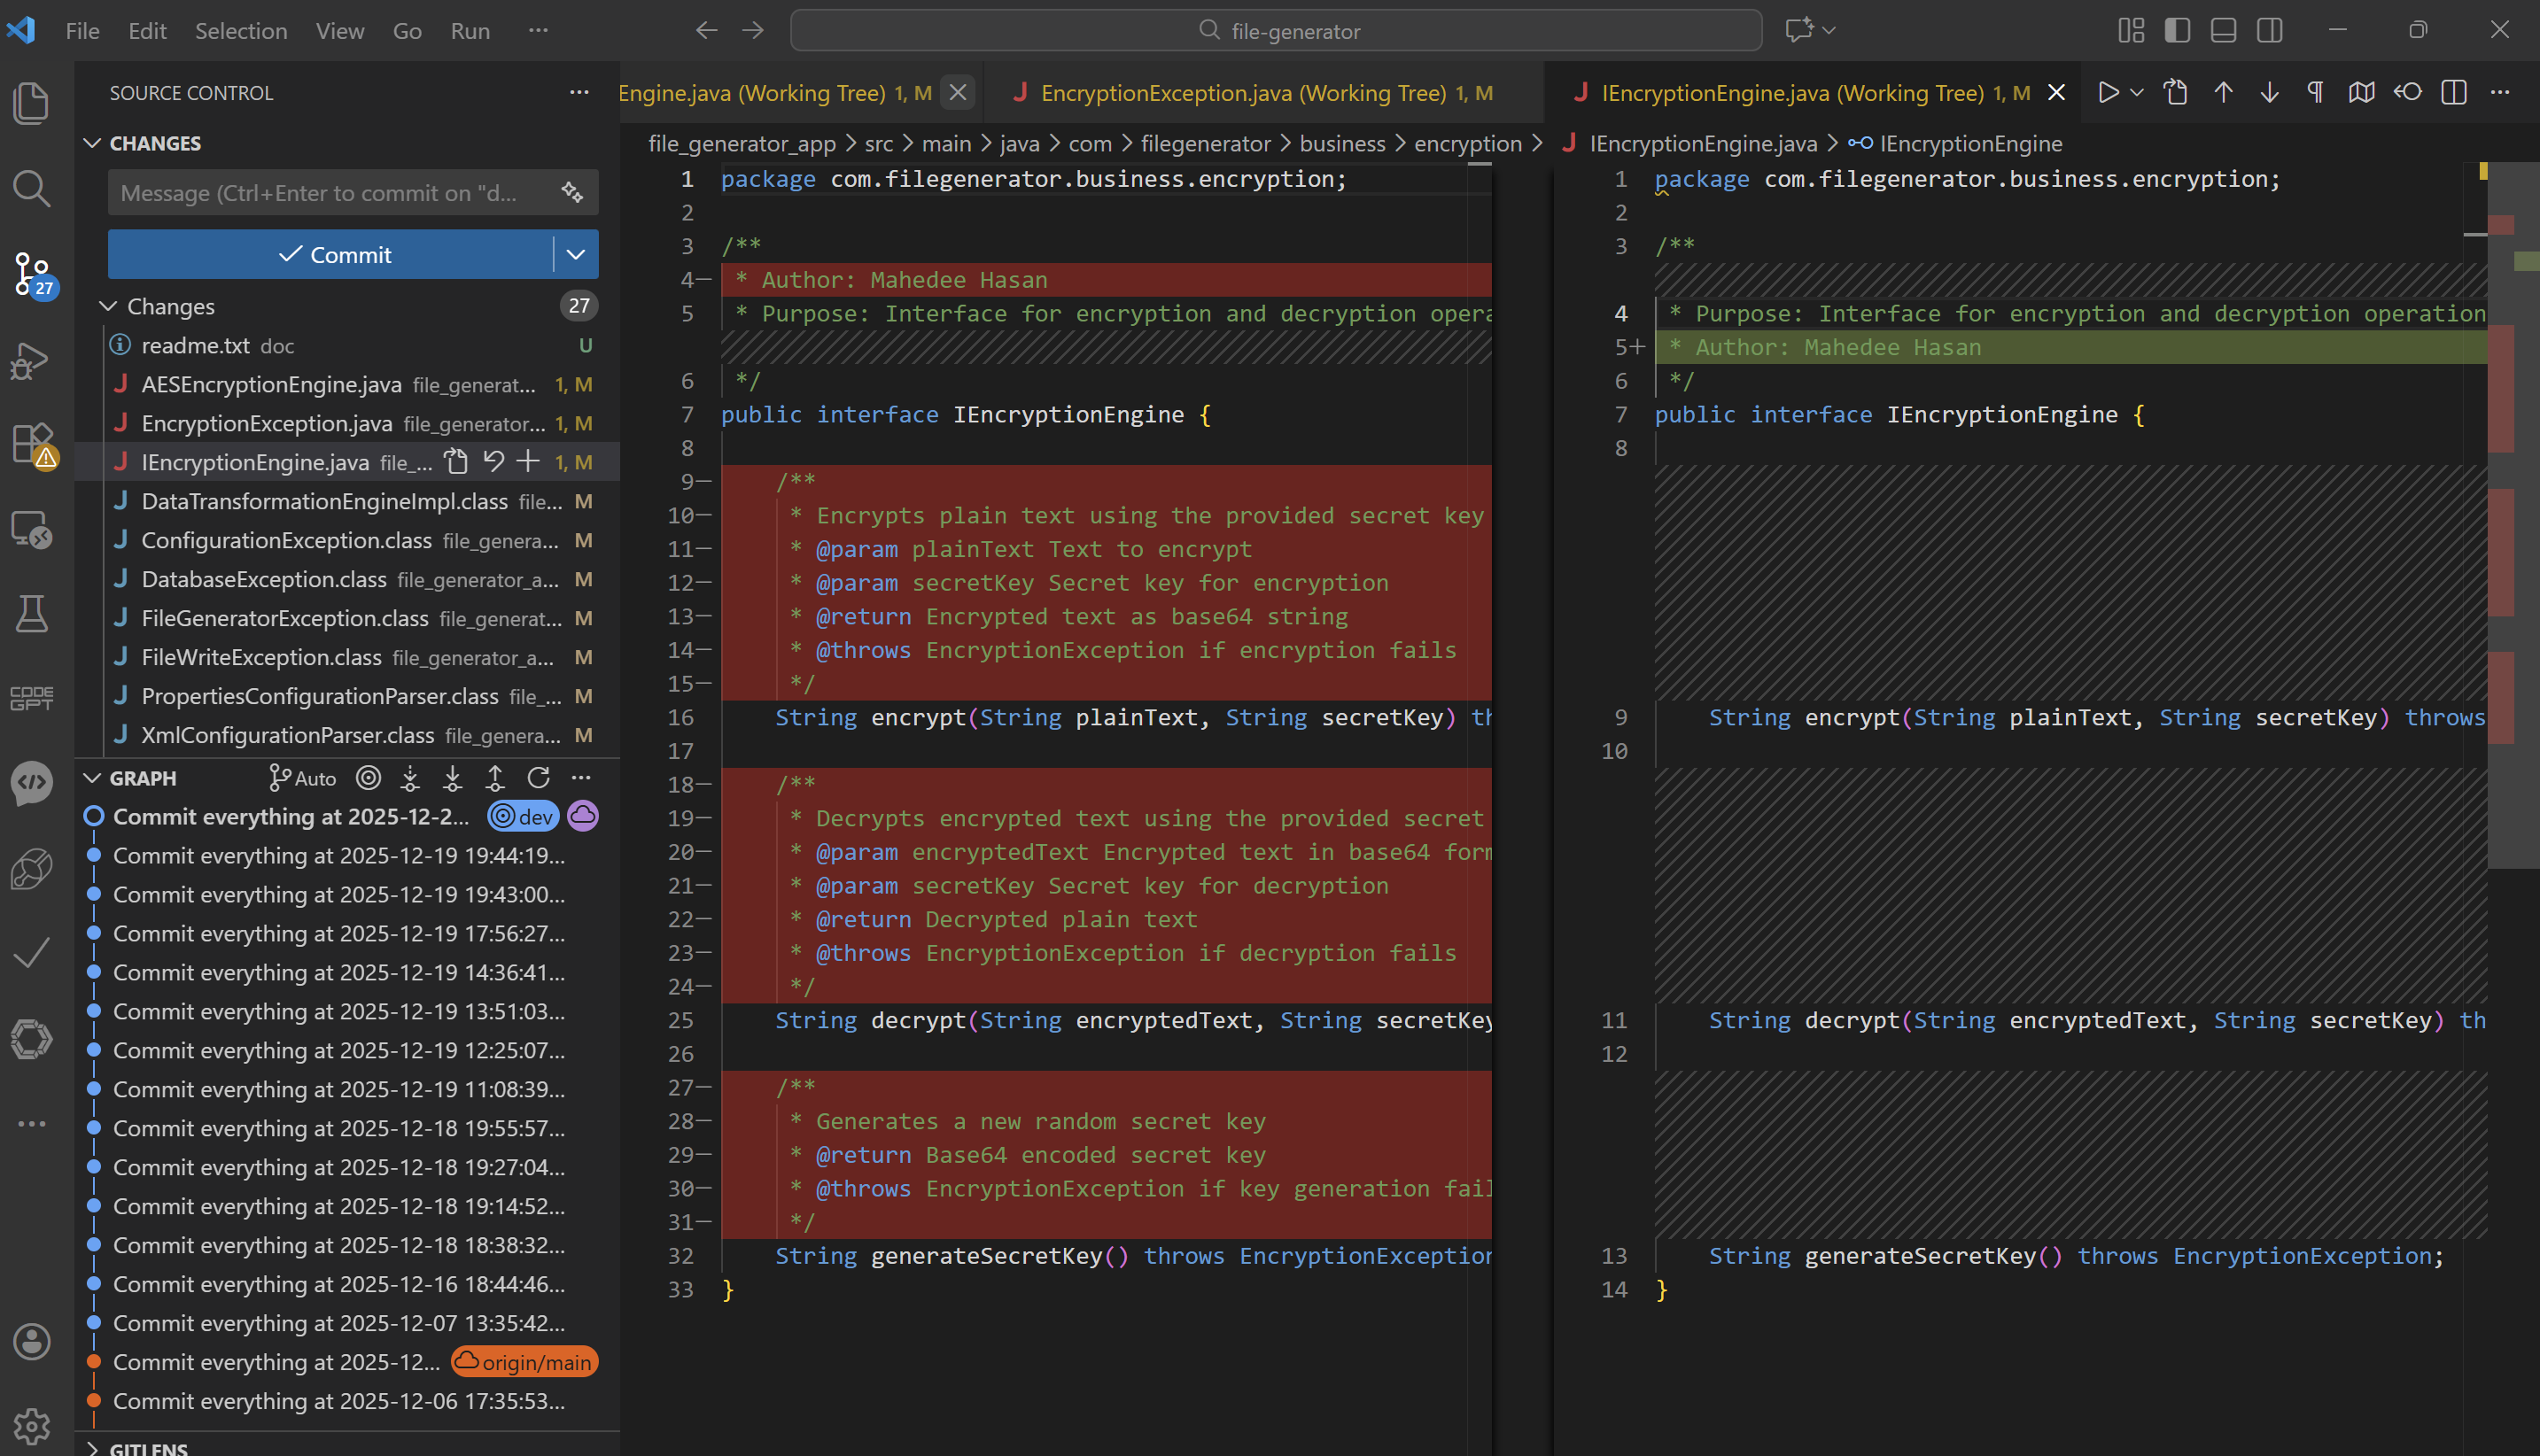
- You will see the local changes on the right side and the previous version on the left side.
Or,
- Press Ctrl + Shift + P
- Search for:
Git: Compare with Branch...
Or,
Git: Open Changes
- Select the remote branch to compare against, e.g., origin/main VS Code will now show:
- All files that differ between your local branch and the remote branch
- Side-by-side diff view
This is ideal before pushing or creating a PR.
Step 3: Review File-Level Differences Click on any file to see:
- Left panel → Remote branch version
- Right panel → Your local version
Color indicators:
- 🟢 Added lines
- 🔴 Removed lines
- 🔵 Modified lines
This visual review helps catch unintended changes quickly.
Step 4: Compare a Single File with Remote
Sometimes you only care about one file.
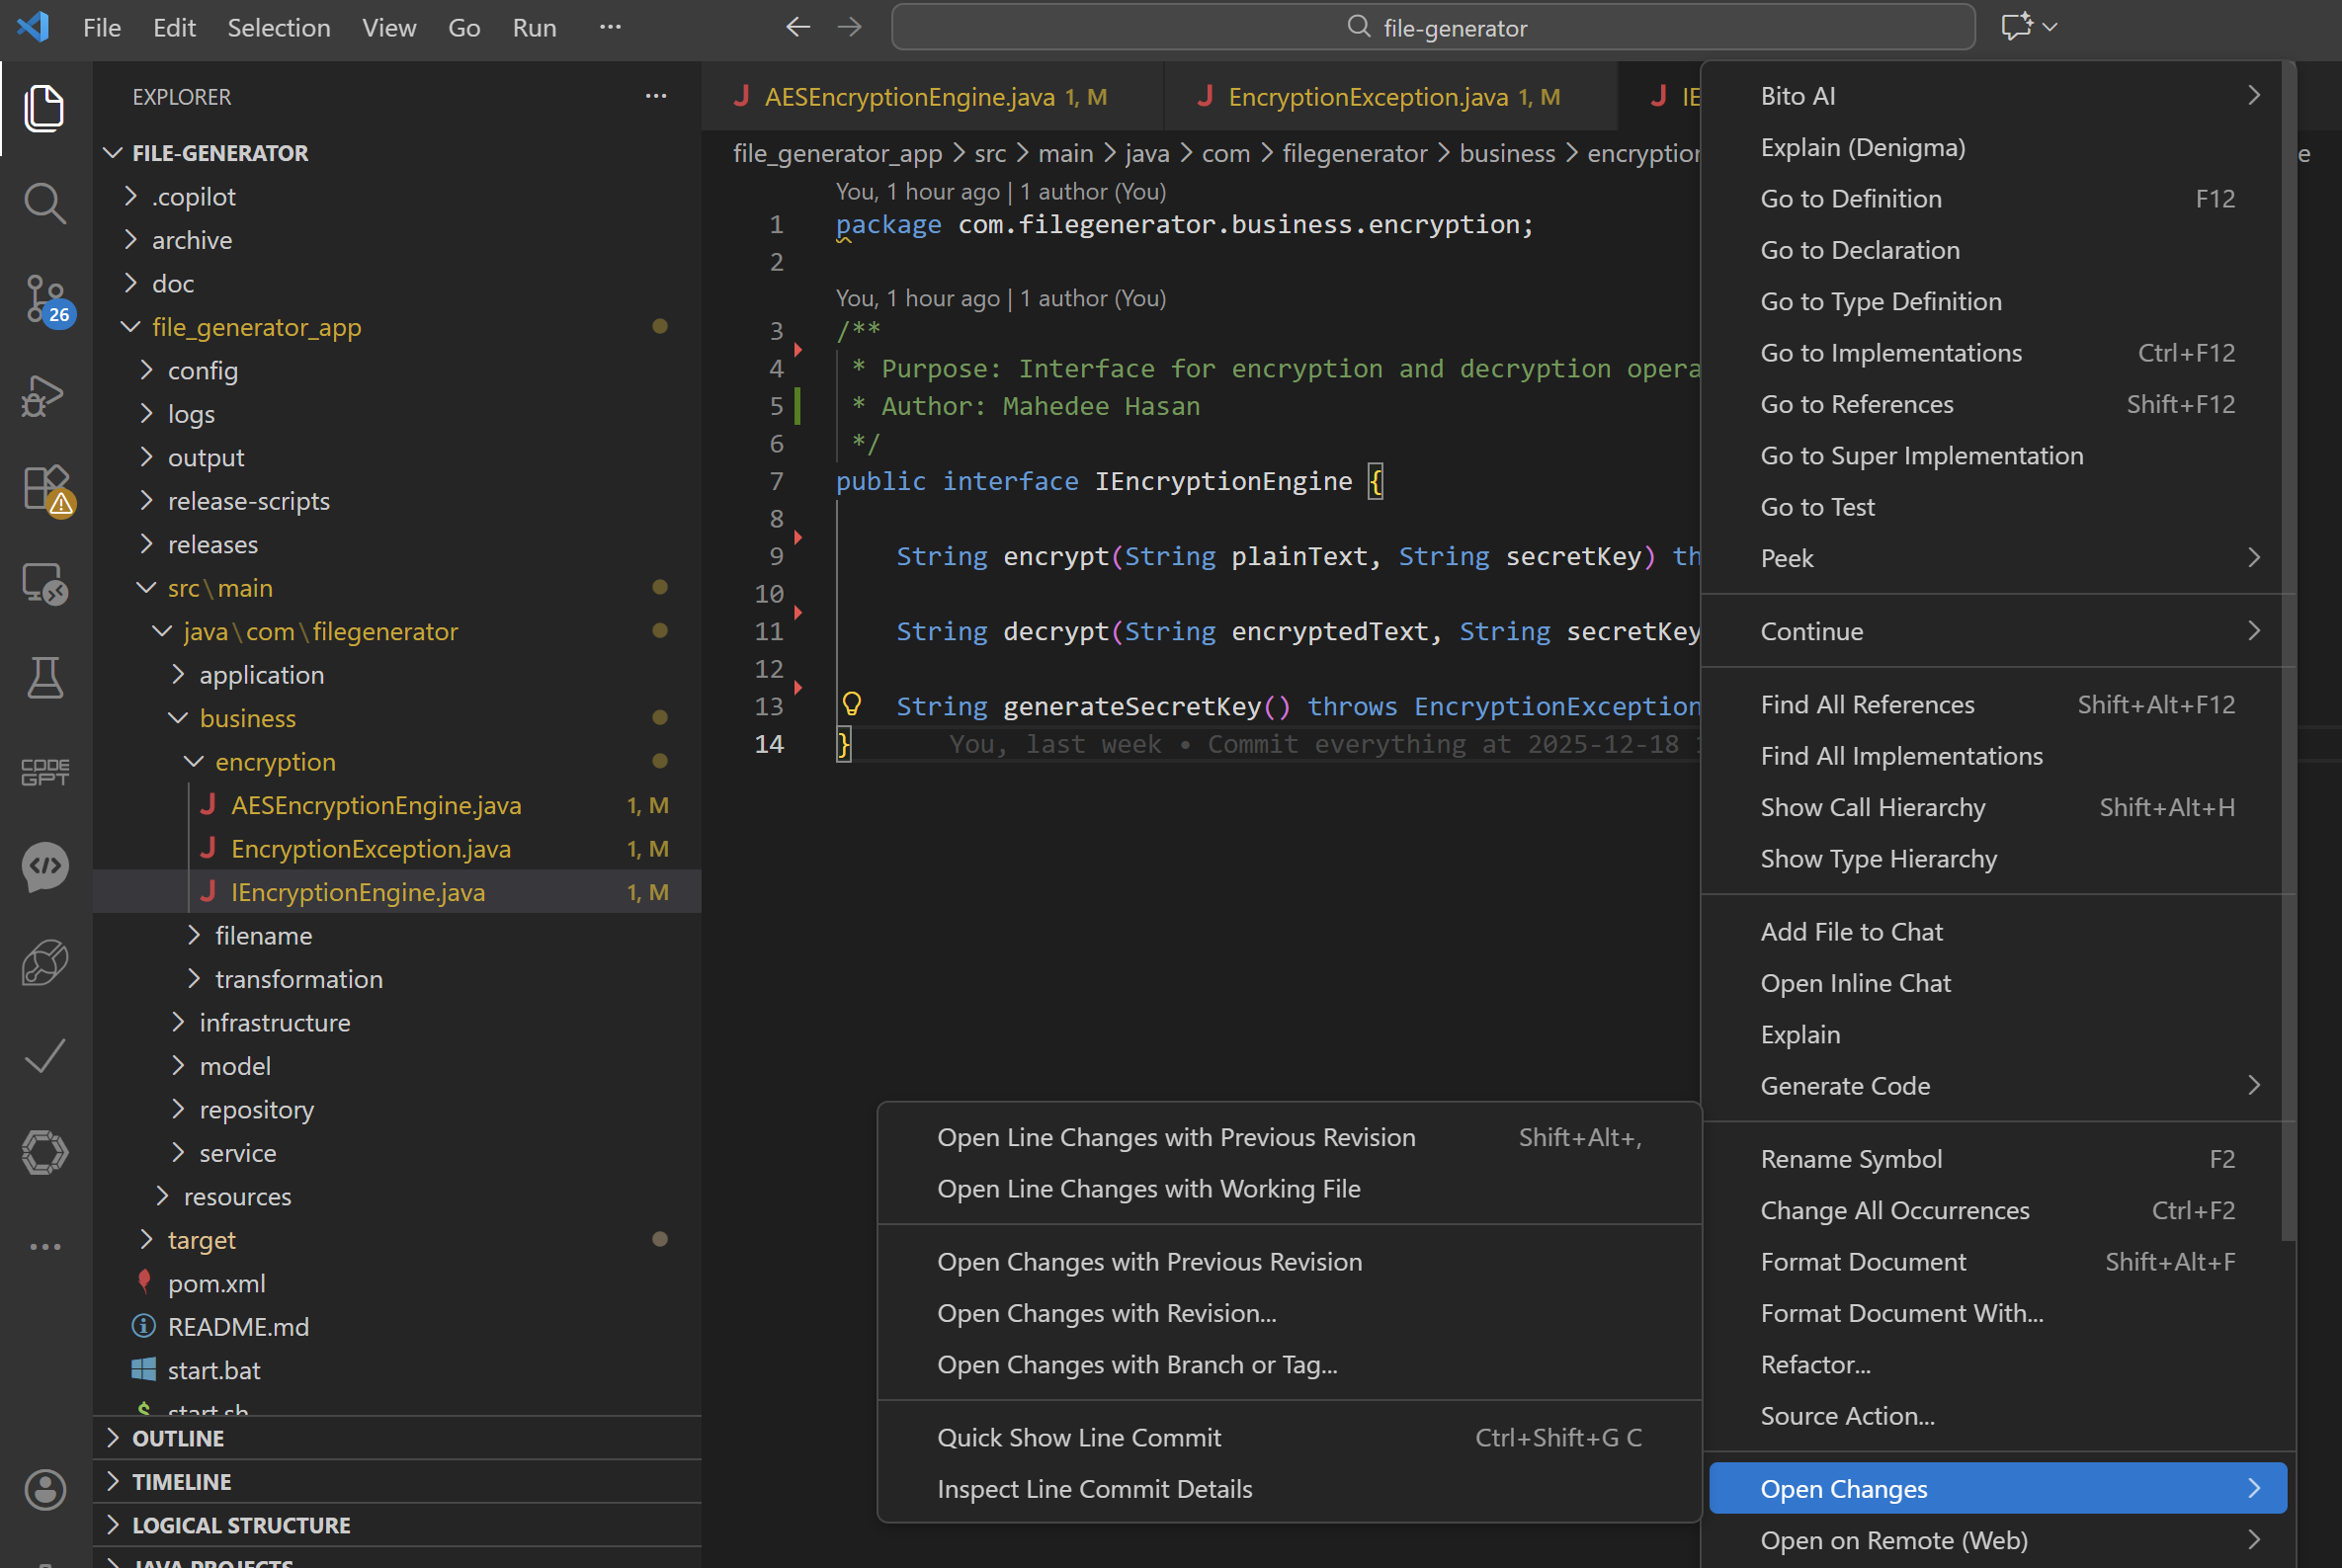
- Open the file
- Right-click inside the editor
Choose: Open Changes -> Open Changes with Branch or Tag…
Part 2: Comparing Changes Using Git Commands (Precise Approach)
While VS Code is great visually, Git CLI gives absolute clarity—especially in complex situations.
Step 1: Check Status of Local Changes First, see what files are changed locally:
git status
This shows:
- Modified files
- Untracked files
- Staged vs unstaged changes
- Whether you’re ahead, behind, or diverged from remote
Step 2: See Commit Differences
- Commits in local but not in remote:
git log origin/dev..HEAD --oneline - Commits in remote but not in local:
git log HEAD..origin/dev --oneline
This is extremely useful before rebasing or pushing.
Step 3: See Line-by-Line Differences
git diff origin/dev
Shows:
- Exact differences between your local working tree and remote branch
- This is the most commonly used comparison command.
Step 4: See Only File Names Changed
git diff --name-status origin/dev
Sample output:
M src/service/UserService.java
A src/service/NewFeature.java
D src/legacy/OldCode.java
Perfect for:
- Impact analysis
- Code reviews
- Release summaries
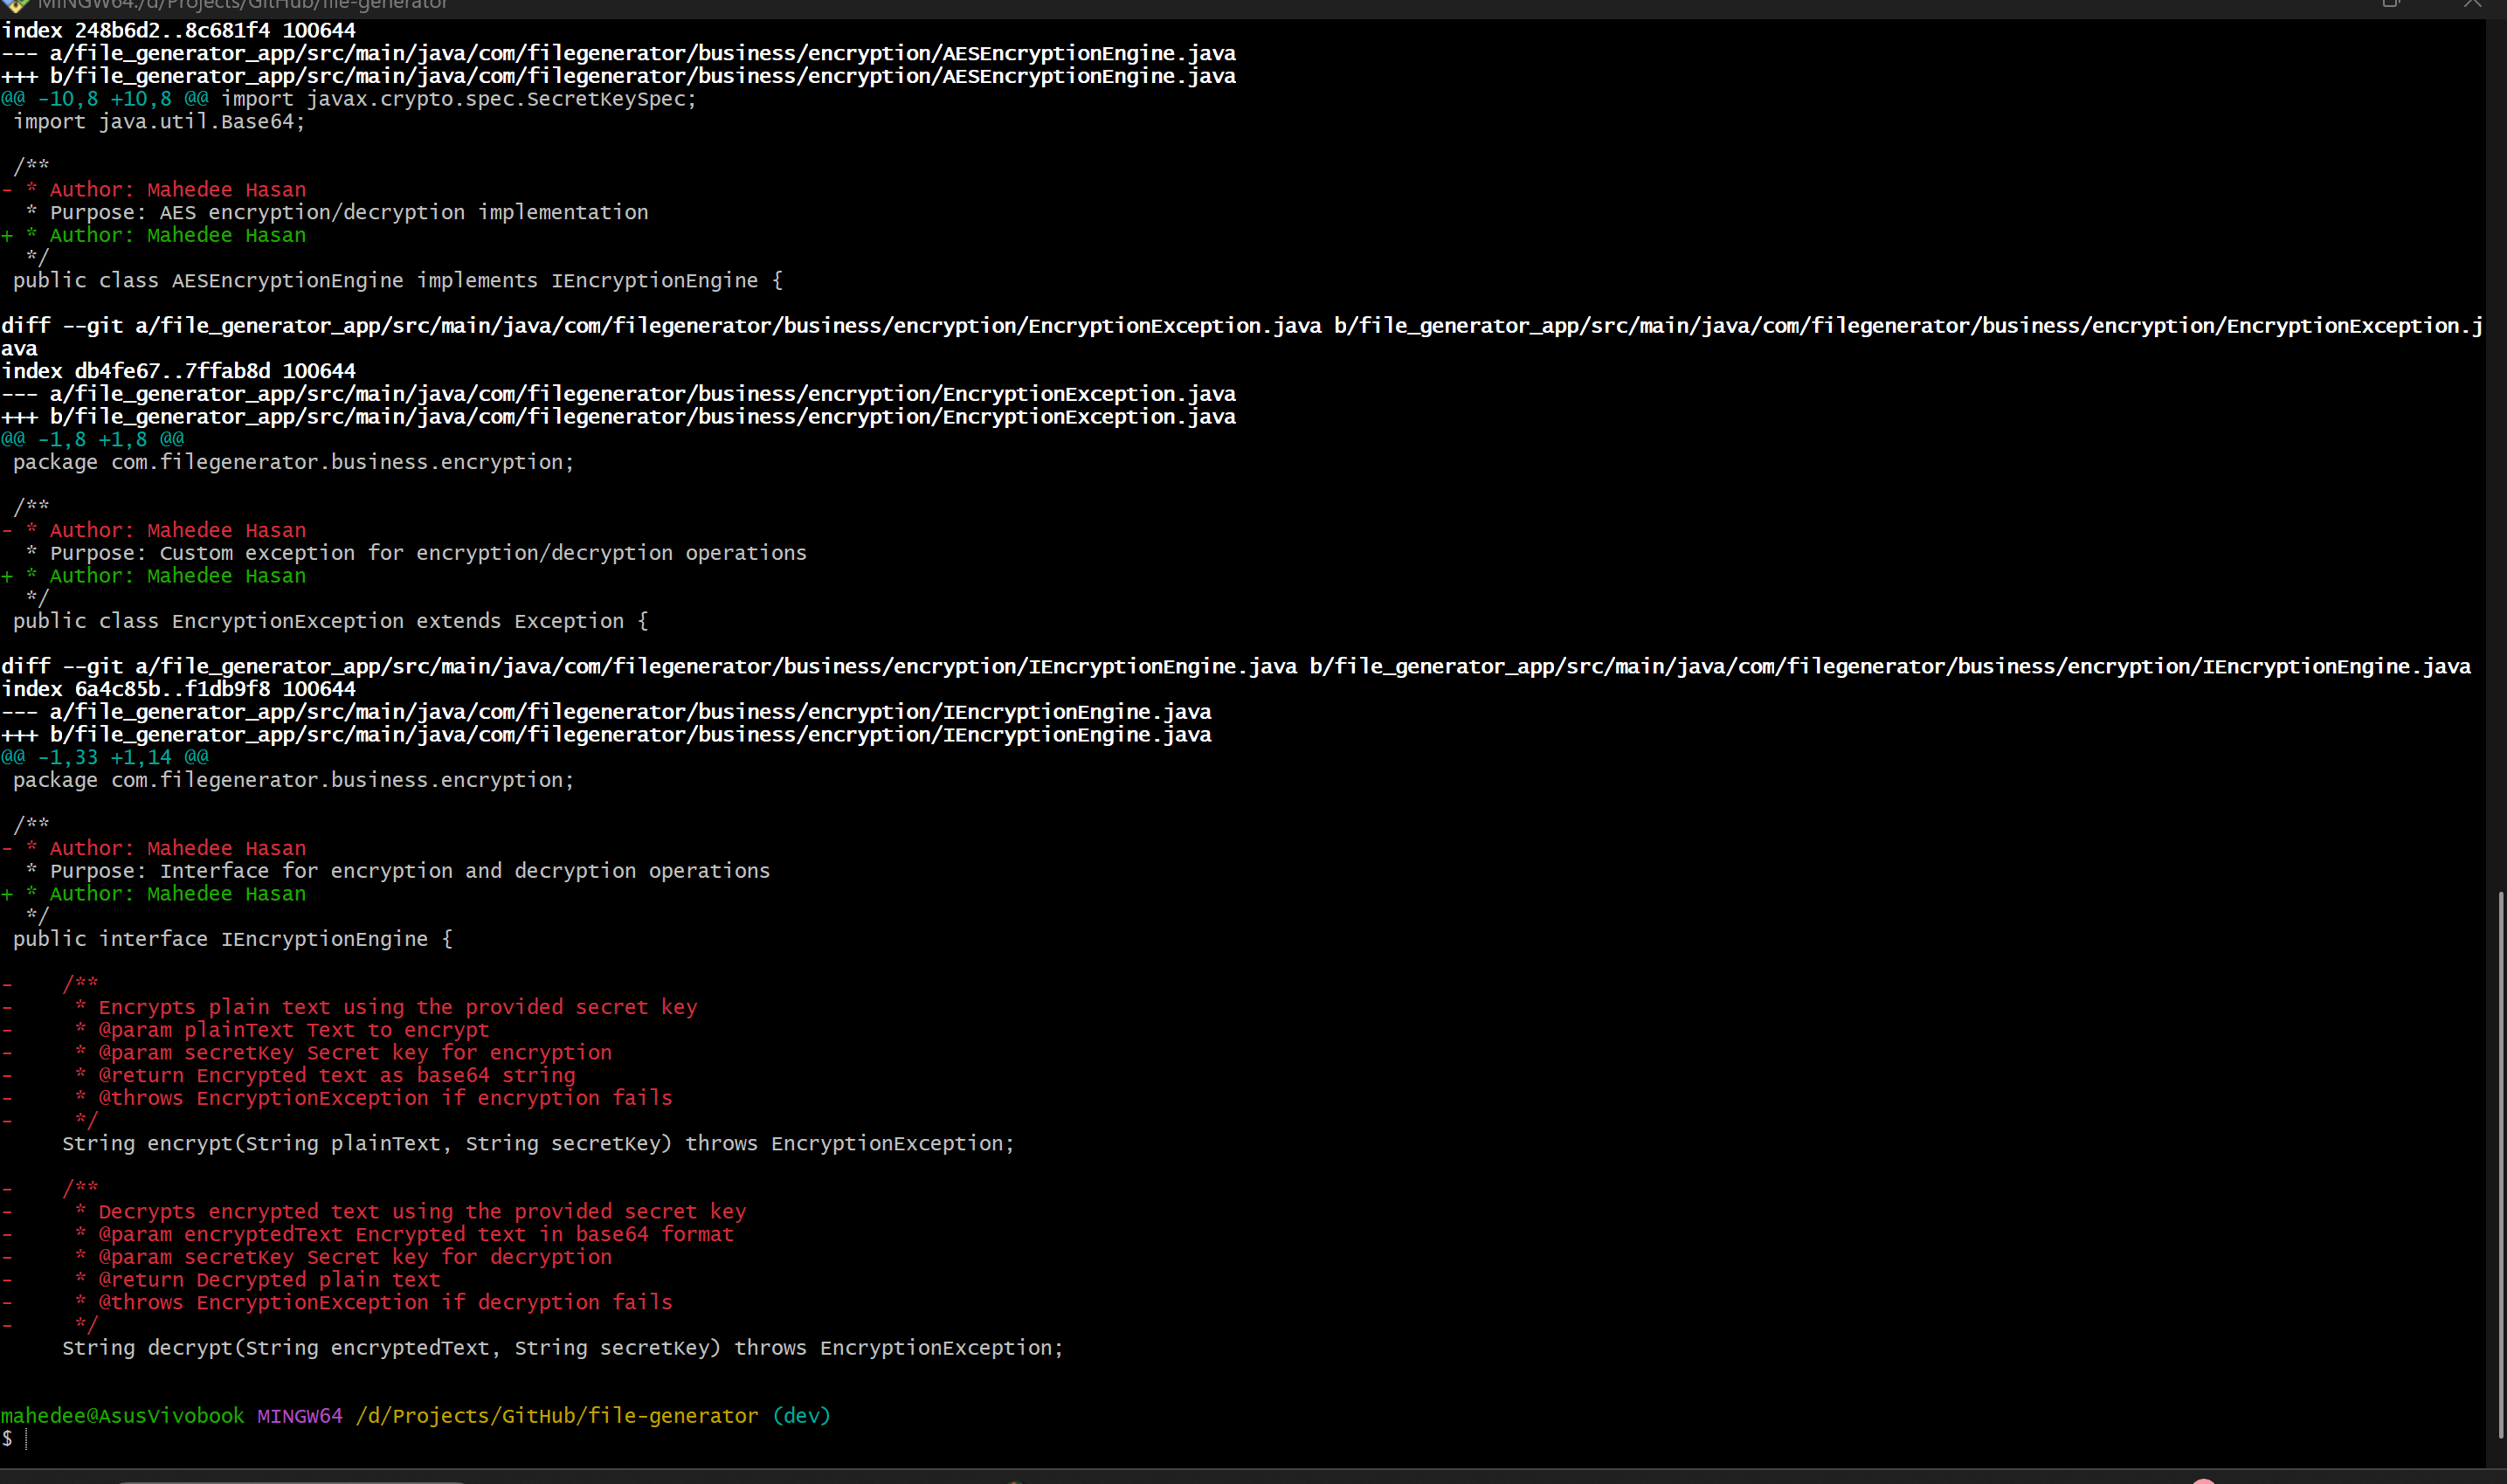
Step 5: Compare Specific Files To compare a specific file:
git diff origin/dev -- path/to/your/file.ext
Example:
$ git diff origin/dev -- file_generator_app/src/main/java/com/filegenerator/business/encryption/AESEncryptionEngine.java
This shows only changes in that file compared to remote.
Step 6: Compare Only Committed Changes
If you’ve already committed changes locally but haven’t pushed them yet:
git diff origin/main..HEAD
This command shows exactly what your local commits will add to the remote branch when pushed—perfect for final review before sharing your work.
Part 3: Advanced Real-World Scenarios
Scenario 1: Feature Branch vs Main Branch
Before opening a Pull Request, always review what changes will be included:
git diff origin/main..feature/login-enhancement
This command shows exactly what your PR will contain, helping you:
- Ensure no unrelated changes are included
- Verify all intended features are present
- Catch any debugging code or temporary changes
Scenario 2: Safe Push Verification
Before pushing to any shared branch, always run this safety check:
git fetch origin
git status
If you see output like:
Your branch is behind 'origin/main' by 3 commits
⚠️ Action Required: Pull or rebase first to avoid merge conflicts and potential overwrites.
Scenario 3: Staged vs Unstaged Review
Before committing, review both staged and unstaged changes separately:
git diff            # Shows unstaged changes
git diff --staged   # Shows staged changes
This two-step review prevents:
- Accidentally committing debugging code
- Missing important changes that weren’t staged
- Creating incomplete or broken commits
Best Practices Checklist
Follow this checklist for professional Git workflows:
✅ Always run git fetch before any comparison
✅ Compare against origin/main, not local main
✅ Use VS Code for visual diff inspection
✅ Use Git CLI for precise command-line analysis
✅ Stage changes selectively using git add -p
✅ Review diffs before every commit and push
✅ Verify branch status before pushing to shared repositories
Recommended Tool: GitLens Extension for VS Code
While not required, the GitLens extension significantly enhances your Git workflow with:
- Line-level blame information - See who changed what and when
- Rich file history visualization - Track changes over time
- Advanced commit comparison - Side-by-side commit analysis
- Team collaboration insights - Understand team contribution patterns
Installation: Search “GitLens” in VS Code Extensions and install it. Especially valuable for large codebases and team environments.
Conclusion
Comparing local changes with remote branches isn’t an advanced Git technique—it’s a fundamental professional practice that separates experienced developers from beginners.
The Visual + Command-Line Approach:
- VS Code provides intuitive visual feedback for quick reviews
- Git CLI offers precise, scriptable analysis for complex scenarios
This workflow prevents common disasters:
- 🚫 Broken builds reaching production
- 🚫 Risky Pull Requests with unreviewed changes
- 🚫 Accidental overwrites of team members’ work
- 🚫 Emergency production fixes due to poor change management
Make this comparison workflow part of your daily development routine. When you do, Git transforms from feeling unpredictable and risky to becoming a reliable, confidence-inspiring tool.
Remember: Professional developers don’t just write code—they carefully manage and review every change before it affects others.
Found this guide helpful? Share it with your development team and help create better Git practices across your organization.
Happy coding! 🚀

Comments