
Configure kubernetes multi-node cluster using containerd and deploy an asp.net core application using docker hub
Overview
Kubernetes is an open-source container orchestration system for automating software deployment, scaling, and management. Google orignially designed Kubernetes, but the Cloud Native Computing Foundation (CNCF) now maintains the project. In this article, I will show you how to configure kubernetese multi-node cluster using containerd and deploy an asp.net core application using docker hub.
Prerequisite
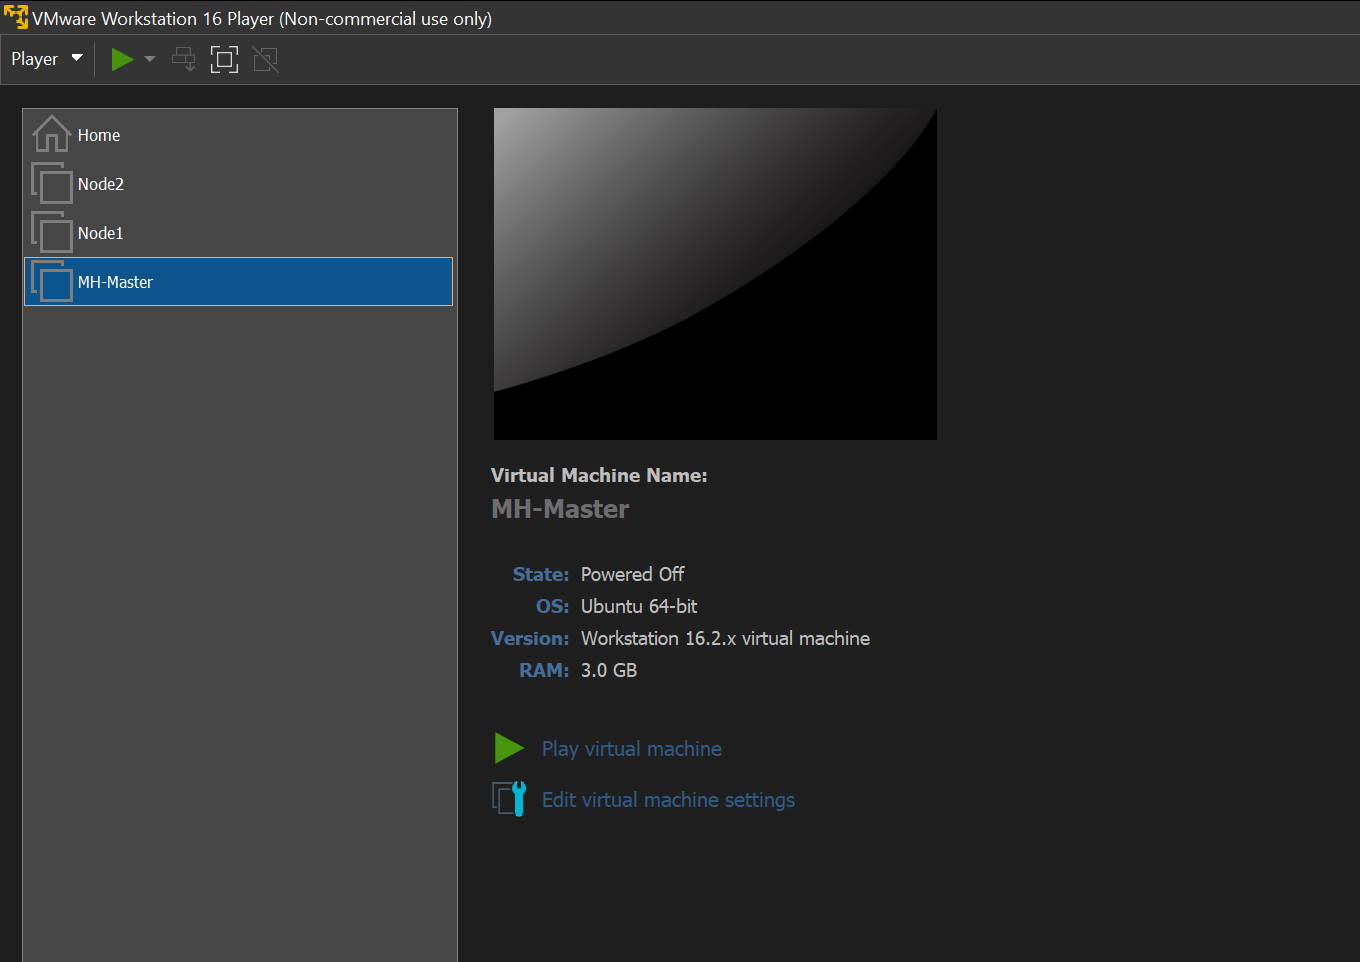
In this article, I am going to describe the procedure of installation and configuration of Kubernetes on Virtual Machine. Here, I have used VMWare workstation and created 3 VM using the following requirements.
System Requirements
- Linux (Ubuntu 21.04)
- CPU 2/4 Core
- Ram 3/6 GB
- Hardisk 15 GB
- Container Runtime - Containerd
- Make sure swap is disabled on the system.
Note: Kubernetes version 1.20, Docker was the container runtime used. In version 1.20, Docker was deprecated and will be removed in 1.23, or later.
Assumption for Network
- We need network connectivity between all nodes in the cluster.
- Ensure each system has unique Hostname.
- Unique Mac Address for each system.
Required Packages
- Containerd - Uses for container runtime
- Kubelet - Drive the work on individual nodes in a cluster.
- Kubeadm - Kubeadm is a tool which is responsible for bootstraping a cluster and getting the cluster component up, running and configured. This tool also use to join additional nodes to a cluster.
- Kubectl - This is the primary command line tool touse to administrate the workloads in a cluster.
I will install all of the above packages in all nodes.
Step 1: Environment setup
- Install Ubuntu on 3 VMs to build kubernetes cluster with one control plane node/Master ndoe and two worker nodes.
- I have used ubuntu-21.04-desktop-amd64.iso to configure Master and worker nodes.
-
Resources for Master Node
- Linux (Ubuntu 21.04)
- CPU 2 Core
- Memory 3 GB
- Disk Space 15 GB
-
Resources for Worker Node 1 and 2
- Linux (Ubuntu 21.04)
- CPU 2 Core
- Memory 3 GB
- Disk Space 15 GB
Here, I am going to configure each of virtual machine with below hostname and static IP. You can use your static IP based on your network setup. Main thing is that each VM has to access internet and has to connect one another through LAN.
| Machine Name | Host Name | IP Address |
|---|---|---|
| Master | mh-master | 192.168.233.10 |
| Node 1 | mh-n1 | 192.168.233.11 |
| Node 2 | mh-n2 | 192.168.233.12 |
Step 2: Configure Master Node
-
Assume that you have already installed Ubuntu on the VM with the above configuration for Master node.
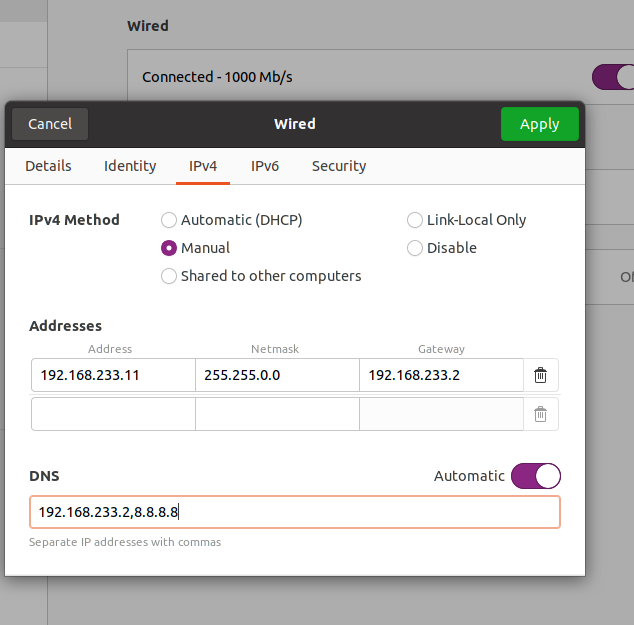
- Configure Static IP on Master Node
- Go to to right corner of desktop -> Wired Connection ->Wired Settings -> Setting of Wired Tab -> Ipv4 -> Set the IP, Gateway and DNS as below.

- Go to to right corner of desktop -> Wired Connection ->Wired Settings -> Setting of Wired Tab -> Ipv4 -> Set the IP, Gateway and DNS as below.
- Restart and Login in to the Master VM
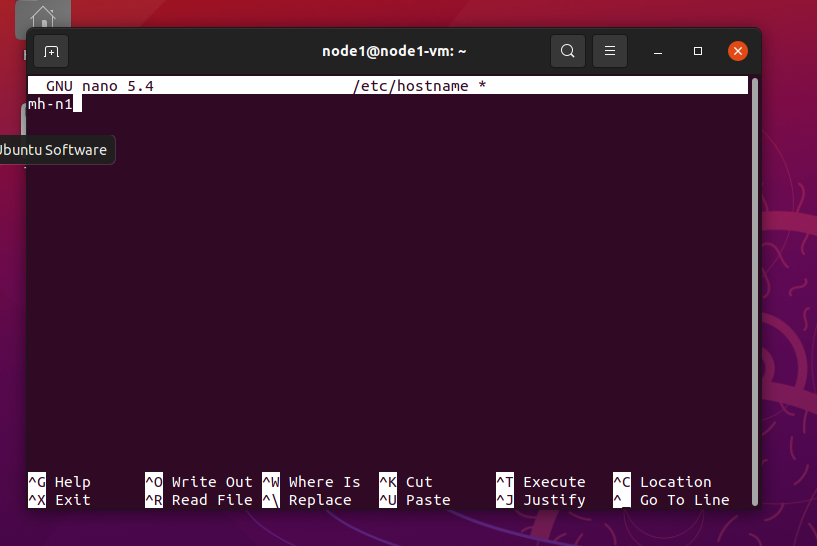
- Open Terminal and write the below command to update the host name.
sudo nano /etc/hostname
A text editor will open. Update the name to mh-master, save and exit.

- Write below command to get the name of ethernet interface
ip link
Output
1: lo: <LOOPBACK,UP,LOWER_UP> mtu 65536 qdisc noqueue state UNKNOWN mode DEFAULT group default qlen 1000
    link/loopback 00:00:00:00:00:00 brd 00:00:00:00:00:00
2: ens33: <BROADCAST,MULTICAST,UP,LOWER_UP> mtu 1500 qdisc fq_codel state UP mode DEFAULT group default qlen 1000
    link/ether 00:0c:29:fa:a6:42 brd ff:ff:ff:ff:ff:ff
    altname enp2s1
From the above output, we can see that the ethernet interface name is ens33.
- Write the below command on terminal to assign static IP address on the network interface.
sudo nano /etc/netplan/01-network-manager-all.yaml
- Update the yml file with the below code.
# Let NetworkManager manage all devices on this system
network:
  version: 2
  renderer: NetworkManager
  ethernets:
    ens33:
      dhcp4: false
      addresses: [192.168.233.10/16]
      gateway4: 192.168.233.2
      nameservers:
        addresses: [192.168.233.2,8.8.8.8]
- Save and exit.
- Apply the changes by running the following command on the terminal.
sudo netplan apply
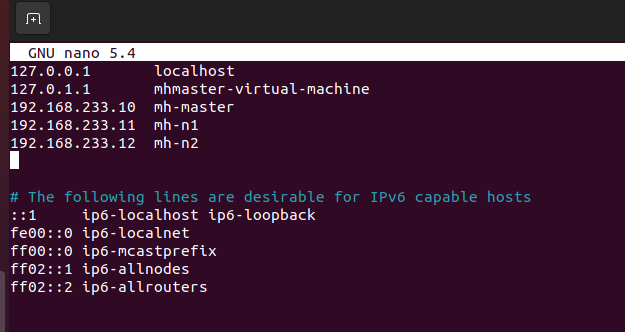
- Now we are going to update hosts file, as we have decided earlier about the host name and IP addresses of each Node. Write below command to open the hosts editor.
sudo nano /etc/hosts
- Update the page with below text. Hosts file includes name to IP mapping for VMs.
192.168.233.10  mh-master
192.168.233.11  mh-n1
192.168.233.12  mh-n2
- Save and exit.
- Reboot the system.
Step 3: Installation of OpenSSH-Server
- Run the following command to install openssh-server.
sudo apt-get install openssh-server
Step 4: Turn off Swap Space
- Write below command on terminal to swapoff.
sudo swapoff -a
- Open fstab file and delete or comment swap line as below, I have commented the swapfile line. Write below command to open fstab file.
sudo nano /etc/fstab
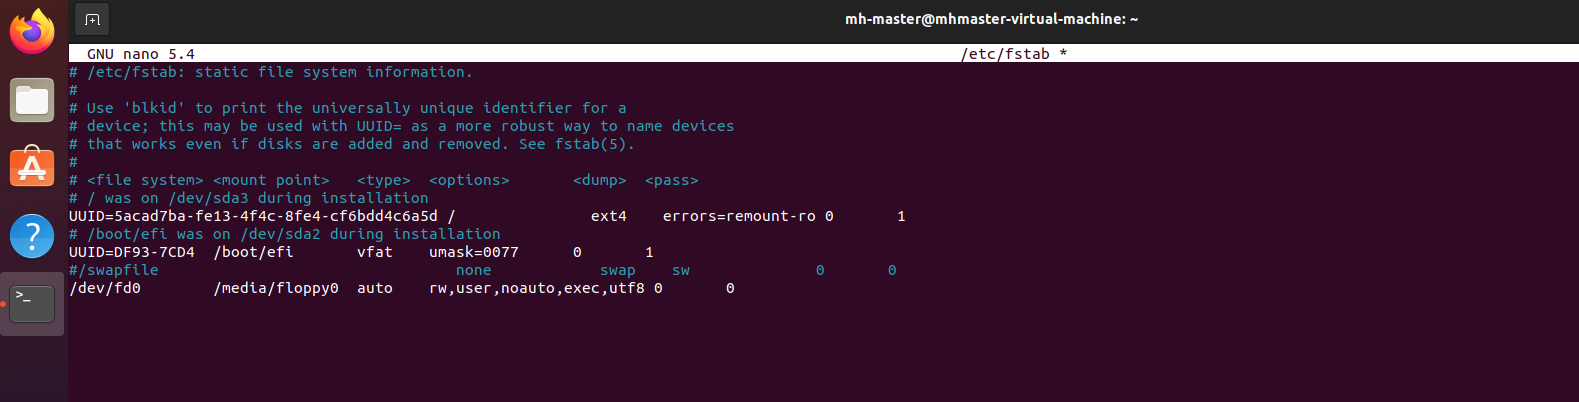
- Save and exit.
- Reboot the system.
Step 5: Install and configure Containerd
We need to load the two modules and configure them to load on boot before start installing Containerd.
- Write the below commands to load modules.
sudo modprobe overlay
sudo modprobe br_netfilter
- Write below command to make sure loaded modules are set on boot.
cat <<EOF | sudo tee /etc/modules-load.d/containerd.conf
overlay
br_netfilter
EOF
- Now we need to Setup required sysctl parameters which persist across reboots. Write below command.
cat <<EOF | sudo tee /etc/sysctl.d/99-kubernetes-cri.conf
net.bridge.bridge-nf-call-iptables  = 1
net.ipv4.ip_forward                 = 1
net.bridge.bridge-nf-call-ip6tables = 1
EOF
- Apply sysctl parameters without reboot with below command.
sudo sysctl --system
- Now is the time to install containerd. Write below commands to install containerd.
sudo apt-get update
sudo apt-get install -y containerd
It will take some time to install containerd.
- Create a directory for containerd configuration file using following command.
sudo mkdir -p /etc/containerd
- Set the cgroup driver for containerd to systemd which is required for the kubelet. Write the following command to open the config.toml file.
sudo nano /etc/containerd/config.toml
- Write the following command to generate default configuration file and write the generated output to config.toml file.
sudo containerd config default | sudo tee /etc/containerd/config.toml
- Now we are going to set the cgroup driver for containerd to systemd which is required for the kubelet. Write below command to open the config.toml file.
sudo nano /etc/containerd/config.toml
- In the config.toml file, update SystemdCgroup. change it from SystemdCgroup = false to SystemdCgroup = true
Note: Ctrl + w for search.

- Save and Exit.
- Restart containerd with the new configuration. Write below command.
sudo systemctl restart containerd
Step 6: Install and Configure Kubeadm, Kubelet and Kubectl
- Install curl using following command
sudo apt install curl
Or
sudo apt-get install -y curl
Note: If you see any process locking message. Restart the VM.
- First we need to add Google’s apt repository gpg key to our system so that we can trust the repository. Write below command
curl -s https://packages.cloud.google.com/apt/doc/apt-key.gpg | sudo apt-key add --
Output:
Warning: apt-key is deprecated. Manage keyring files in trusted.gpg.d instead (see apt-key(8)).
OK
- Add the Kubernetes apt repository and that going to configure that local apt repository to our local system. Write below command.
sudo bash -c 'cat <<EOF >/etc/apt/sources.list.d/kubernetes.list
deb https://apt.kubernetes.io/ kubernetes-xenial main
EOF'
- Update the package list and use apt-cache policy to inspect versions available in the repository. Write below command.
sudo apt-get update
apt-cache policy kubelet | head -n 20
- Now we are going to Install the required packages, if needed we can request a specific version.
VERSION=1.21.0-00
sudo apt-get install -y kubelet=$VERSION kubeadm=$VERSION kubectl=$VERSION
- Write below command to mark all four packages hold and this will prevent these packages from being updated.
sudo apt-mark hold kubelet kubeadm kubectl containerd
- Check the status of kubelet with below command. The kubelet will enter a crashloop until a cluster is created or the node is joined to an existing cluster.
sudo systemctl status kubelet.service
- Check the status of Containerd with below command.
sudo systemctl status containerd.service
If you see the containerd is active and running, it means it is up and loaded and in a proper state.
- Ensure Kubelet and Containerd are set to start when the system starts up. Write below command to execute.
sudo systemctl enable kubelet.service
sudo systemctl enable containerd.service
Step 7:Install and configure control plane / Master node
Creating a Cluster
- Write the below command to download calico.yaml file.
wget https://docs.projectcalico.org/manifests/calico.yaml
- Open calico.yaml and find the setting for Pod Network IP address range CALICO_IPV4POOL_CIDR, adjust if needed for your infrastructure to ensure that the Pod network IP, range doesn’t overlap with other networks in our infrastructure.
sudo nano calico.yaml

As you can see the value for CALICO_IPV4POOL_CIDR is 192.168.0.0/16. All pods are going to be allocated IP’s from that network range. We need to make sure that the network range should not overlap with other network in our infracture. Exit without update anything in this page.
- Generate a default kubeadm init configuration file. This defines the settings of the cluster being built. Write below command to create kubeconfig init configuration file. This configuration file is going to define the settings of the cluster that kubeadm going to built for us.
kubeadm config print init-defaults | tee ClusterConfiguration.yaml

advertiseAddress is the IP address of the API Server and we are going to update that to our IP address of our Control Plane Node which is our cluster going to be 192.168.254.10. we are also going to update criSocket from dockershim to container runtime we are using which is containerd.
- Change the address of the localAPIEndpoint.advertiseAddress to the Control Plane Node’s IP address. Write below command.
sed -i 's/ advertiseAddress: 1.2.3.4/ advertiseAddress: 192.168.233.10/' ClusterConfiguration.yaml
- Set the CRI Socket to point to containerd with below command.
sed -i 's/ criSocket: \/var\/run\/dockershim\.sock/ criSocket: \/run\/containerd\/containerd\.sock/' ClusterConfiguration.yaml
- Added configuration to set the node name for the control plane node to the actual hostname.
sed -i 's/ name: node/ name: mh-master/' ClusterConfiguration.yaml
- Set the cgroupDriver to system for the kubelet. This configuration is not exist default that generated by kubeadm so we are going to add that to our cluster configuration file. Write below command.
cat <<EOF | cat >>  ClusterConfiguration.yaml
---
apiVersion: kubelet.config.k8s.io/v1beta1
kind: KubeletConfiguration
cgroupDriver: systemd
EOF
- Review the Cluster configuration file, update the version to match what you’ve installed. Write below command.
cat ClusterConfiguration.yaml

- Now we are going to bootstrap our cluster and going to add CRI socket since there’s a check for docker in the kubeadm init process.
sudo kubeadm init \
    --config=ClusterConfiguration.yaml \
    --cri-socket /run/containerd/containerd.sock
- Configure our account on the Control Plane Node to have admin access to the API server from a non-privileged account. Create a directory by below command.
mkdir -p $HOME/.kube
- Now copy that admin.conf file into our users home directory so we can use that to connect to kubernetes.
sudo cp -i /etc/kubernetes/admin.conf $HOME/.kube/config
- We are now going to change the permissions on that so regular user can access the file.
sudo chown $(id -u):$(id -g) $HOME/.kube/config
Step 8: Creating a Pod Network
- Deploy yaml file for pod network References with below command.
kubectl apply -f calico.yaml
- Look for the all the system pods and calico pods to change to Running. The DNS pod won’t start (pending) until the Pod network is deployed and Running.
kubectl get pods --all-namespaces
Output:
NAMESPACE     NAME                                       READY   STATUS    RESTARTS   AGE
kube-system   calico-kube-controllers-6fd7b9848d-vhjxp   1/1     Running   0          113s
kube-system   calico-node-zbtrv                          1/1     Running   0          113s
kube-system   coredns-558bd4d5db-njgwh                   1/1     Running   0          9m23s
kube-system   coredns-558bd4d5db-w2rx7                   1/1     Running   0          9m23s
kube-system   etcd-mh-master                             1/1     Running   0          9m30s
kube-system   kube-apiserver-mh-master                   1/1     Running   0          9m30s
kube-system   kube-controller-manager-mh-master          1/1     Running   0          9m30s
kube-system   kube-proxy-bbrh9                           1/1     Running   0          9m23s
kube-system   kube-scheduler-mh-master                   1/1     Running   0          9m30s
All pods are running.
-
Control plane pods:
- etcd-mh-master
- kube-apiserver-mh-master
- kube-controller-manager-mh-master
- kube-scheduler-mh-master
- Kube proxy Pod:
- kube-proxy-bbrh9 (This pod is going to implement service networking on individual nodes)
- Core DNS Pods:
- coredns-558bd4d5db-njgwh
- coredns-558bd4d5db-w2rx7
- Calico Pods:
- calico-kube-controllers-6fd7b9848d-vhjxp
- calico-node-zbtrv
- You can also check with below command for continuous iteration status of each pods.
kubectl get pods --all-namespaces --watch
- Get a list of our current nodes with below command
kubectl get nodes
- Check out the systemd unit and it’s no longer crash looping because it has static pods to start.
sudo systemctl status kubelet.service
You can exit by pressing ( ctrl+c );
Step 9: Static Pod manifests
- Check static pod manifests on the Control Plane Node with below command.
ls /etc/kubernetes/manifests
Output:
etcd.yaml kube-apiserver.yaml kube-controller-manager.yaml kube-scheduler.yaml
- You can also look more closely at API server and etcd’s manifest with below command.
sudo more /etc/kubernetes/manifests/etcd.yaml
sudo more /etc/kubernetes/manifests/kube-apiserver.yaml
- Check out the directory where the kubeconfig files live for each of the control plane pods.
ls /etc/kubernetes
Output:
admin.conf controller-manager.conf kubelet.conf manifests pki scheduler.conf
Configure Worker Nodes 1
Step 10: Configure Host name, Hosts file and define a static IP address
-
Assume that you have already installed Ubuntu on the VM with the mentioned configuration for the Node1.
- Configure Static IP on Master Node
- Go to to right corner of desktop -> Wired Connection ->Wired Settings -> Setting of Wired Tab -> Ipv4 -> Set the IP, Gateway and DNS as below.
- Go to to right corner of desktop -> Wired Connection ->Wired Settings -> Setting of Wired Tab -> Ipv4 -> Set the IP, Gateway and DNS as below.
- Login into Node1 VM and open Terminal.
- Write below command to update the host name.
sudo nano /etc/hostname
A text editor will open and update the name to mh-n1 and save and exit.
- Write below command to identify the name of the Ethernet interface.
ip link
Output:
1: lo: <LOOPBACK,UP,LOWER_UP> mtu 65536 qdisc noqueue state UNKNOWN mode DEFAULT group default qlen 1000
    link/loopback 00:00:00:00:00:00 brd 00:00:00:00:00:00
2: ens33: <BROADCAST,MULTICAST,UP,LOWER_UP> mtu 1500 qdisc fq_codel state UP mode DEFAULT group default qlen 1000
    link/ether 00:0c:29:32:3d:0f brd ff:ff:ff:ff:ff:ff
    altname enp2s1
As we can see that our ethernet interface name is ens33.
- To assign a static IP address on the network interface, open the YAML configuration file with a text editor with below command.
sudo nano /etc/netplan/01-network-manager-all.yaml
- Update the page with below code.
network:
  version: 2
  renderer: NetworkManager
  ethernets:
    ens33:
      dhcp4: false
      addresses: [192.168.233.11/16]
      gateway4: 192.168.233.2
      nameservers:
        addresses: [192.168.233.2,8.8.8.8]
- Save and exit
- Apply the changes by running the following command.
sudo netplan apply
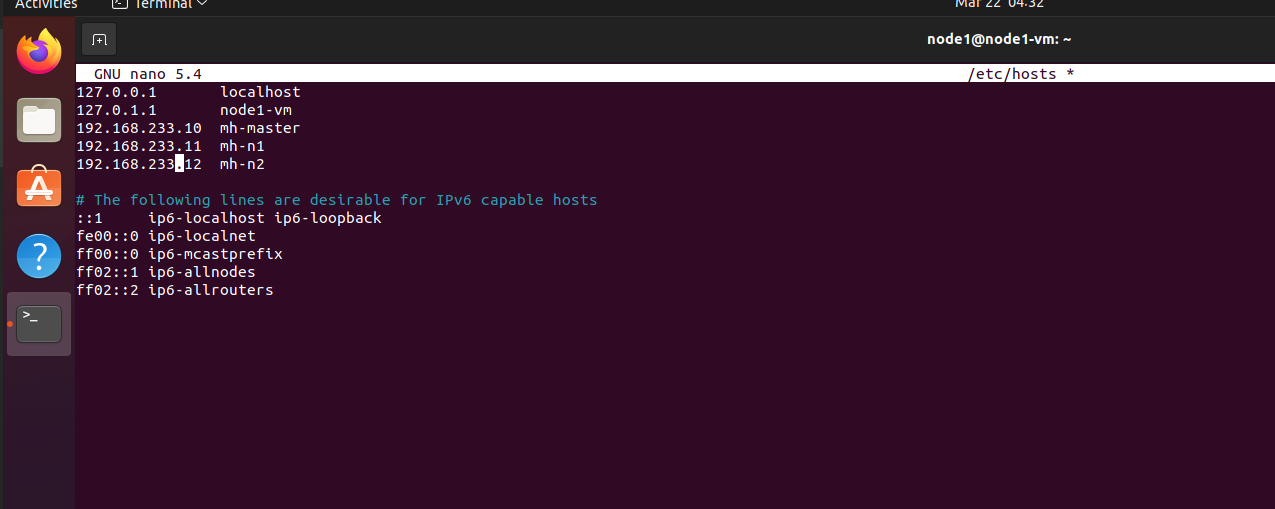
- Now we are going to update hosts file, as we have decided earlier about the host name and IP addresses of each Node. Write below command to open the hosts editor.
sudo nano /etc/hosts
- Hosts file includes name to IP mappings for VMs. Update the page with below text.
192.168.233.10  mh-master
192.168.233.11  mh-n1
192.168.233.12  mh-n2
- Save and exit.
- Reboot the system.
Step 11: Installation of OpenSSH-Server
- Now we have to install openshh-server. Run the following command:
sudo apt-get install openssh-server
Step 12: Turn off swap space
- We need disable swap before we start doing any other process. Write below command to swapoff.
sudo swapoff -a
- Open fstab file and delete or comment swap line as below, I have commented the swapfile line. Write below command to open fstab file.
sudo nano /etc/fstab
- Save and exit.
- Reboot the system.
Step 13: Installation and Configuration of Containerd
We are going to load two modules and configure them to load on boot before start installing Containerd. The process of installing containerd is same as we did for Master Node.
- Write below commands to load modules.
sudo modprobe overlay
sudo modprobe br_netfilter
- Write below command to make sure loaded modules are set on boot.
cat <<EOF | sudo tee /etc/modules-load.d/containerd.conf
overlay
br_netfilter
EOF
- Now we need to Setup, required sysctl parameters which persist across reboots. Write below command.
cat <<EOF | sudo tee /etc/sysctl.d/99-kubernetes-cri.conf
net.bridge.bridge-nf-call-iptables  = 1
net.ipv4.ip_forward                 = 1
net.bridge.bridge-nf-call-ip6tables = 1
EOF
- Apply sysctl parameters without reboot with below command.
sudo sysctl --system
- Now is the time to install containerd. Write below commands to install containerd.
sudo apt-get update
sudo apt-get install -y containerd
- We need to apply some configuration specific to containerd, first we will create a directory for a containerd configuration file to keep, then we will use containerd command to generate default configuration file and write the generated output to config.toml file with below commands.
sudo mkdir -p /etc/containerd

sudo containerd config default | sudo tee /etc/containerd/config.toml
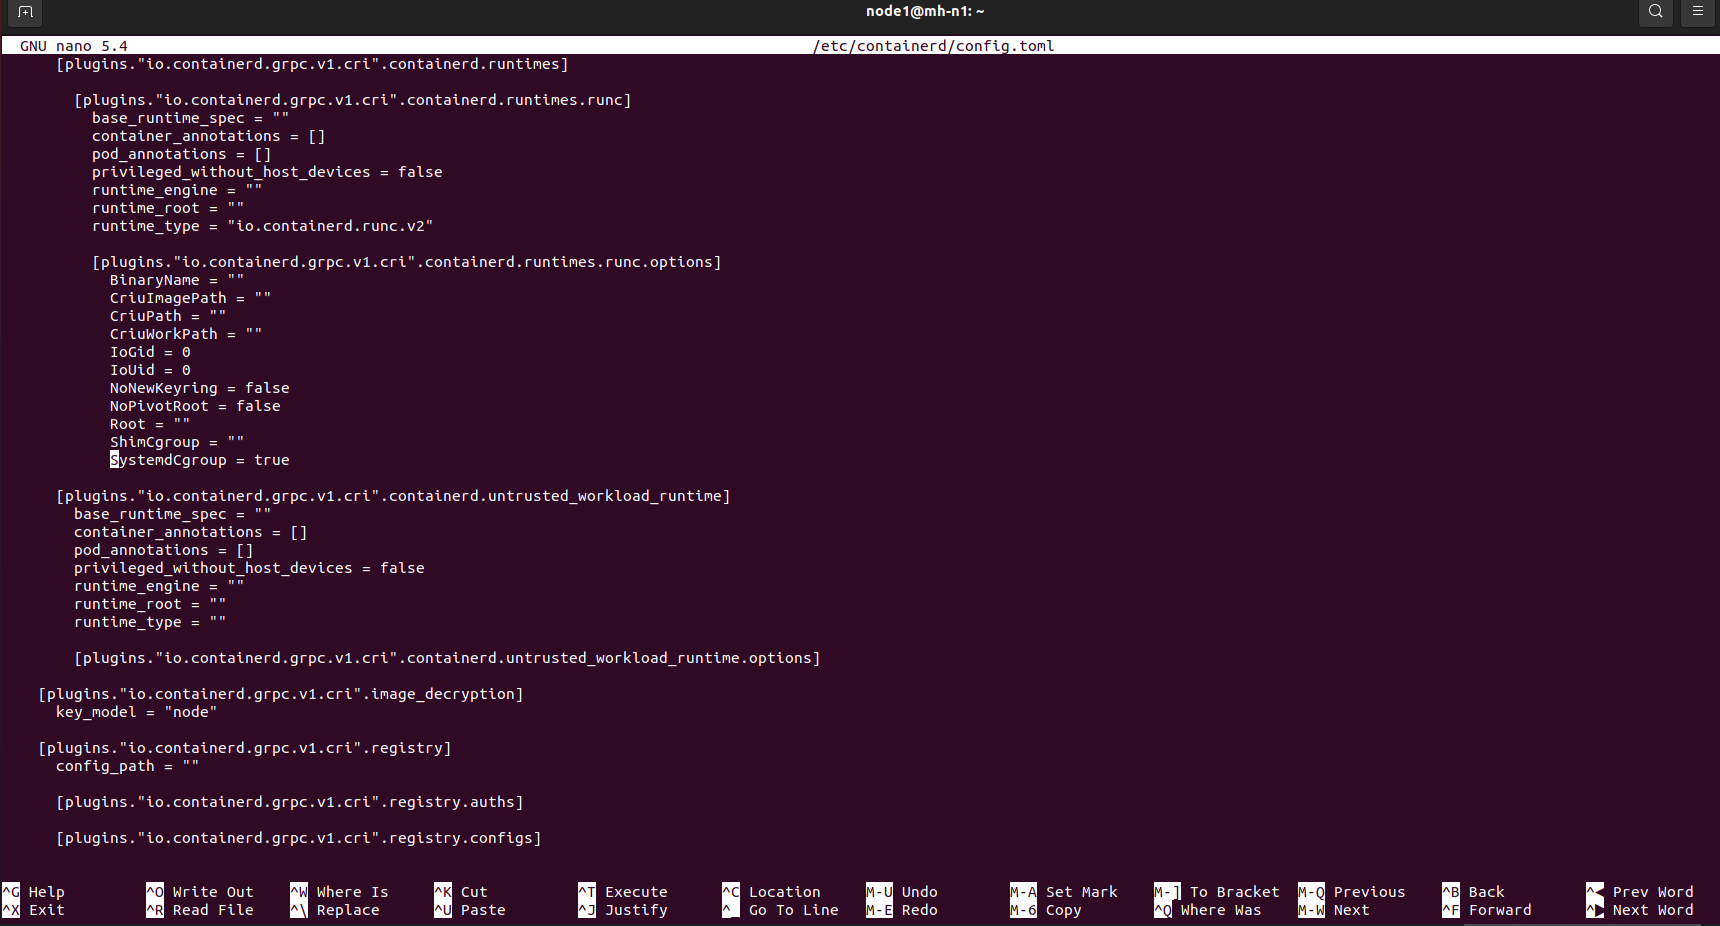
- Now we are going to set the cgroup driver for containerd to systemd which is required for the kubelet. Write below command to open the config.toml file.
sudo nano /etc/containerd/config.toml
- In the config.toml file, update SystemdCgroup. change it from SystemdCgroup = false to SystemdCgroup = true
-
Save & Exit.
-
Restart containerd with the new configuration. Write below command.
sudo systemctl restart containerd
Step 14: Install and Configure Kubeadm, Kubelet and Kubectl
- Now we are going to Install Kubernetes packages - kubeadm, kubelet and kubectl. First we need to add Google’s apt repository gpg key to our system so that we can trust the repository. Write below command. (please install curl if not installed)
sudo apt-get install -y curl

curl -s https://packages.cloud.google.com/apt/doc/apt-key.gpg | sudo apt-key add -
Output:
Warning: apt-key is deprecated. Manage keyring files in trusted.gpg.d instead (see apt-key(8)).
OK
- Add the Kubernetes apt repository and that going to configure that local apt repository to our local system. Write below command.
sudo bash -c 'cat <<EOF >/etc/apt/sources.list.d/kubernetes.list
deb https://apt.kubernetes.io/ kubernetes-xenial main
EOF'
- Update the package list and use apt-cache policy to inspect versions available in the repository. Write below command.
sudo apt-get update
apt-cache policy kubelet | head -n 20
Output:
kubelet:
  Installed: (none)
  Candidate: 1.23.5-00
  Version table:
     1.23.5-00 500
        500 https://apt.kubernetes.io kubernetes-xenial/main amd64 Packages
     1.23.4-00 500
        500 https://apt.kubernetes.io kubernetes-xenial/main amd64 Packages
     1.23.3-00 500
        500 https://apt.kubernetes.io kubernetes-xenial/main amd64 Packages
     1.23.2-00 500
        500 https://apt.kubernetes.io kubernetes-xenial/main amd64 Packages
     1.23.1-00 500
        500 https://apt.kubernetes.io kubernetes-xenial/main amd64 Packages
     1.23.0-00 500
        500 https://apt.kubernetes.io kubernetes-xenial/main amd64 Packages
     1.22.8-00 500
        500 https://apt.kubernetes.io kubernetes-xenial/main amd64 Packages
     1.22.7-00 500
        500 https://apt.kubernetes.io kubernetes-xenial/main amd64 Packages
In the output, we can see different versions of kubelet that are available as packages in the repository.
- Now we are going to Install the required packages, if needed we can request a specific version.
VERSION=1.21.0-00

sudo apt-get install -y kubelet=$VERSION kubeadm=$VERSION kubectl=$VERSION
- Write below command to mark all four packages hold and this will prevent these packages from being updated.
sudo apt-mark hold kubelet kubeadm kubectl containerd
- Check the status of kubelet with below command. The kubelet will enter a crashloop until a cluster is created or the node is joined to an existing cluster.
sudo systemctl status kubelet.service
-
You can exit by pressing ( ctrl+c )
-
Check the status of Containerd with below command.
sudo systemctl status containerd.service
We can see that Containerd is active and running, so it is up and loaded and in a proper state.
- Ensure Kubelet and Containerd are set to start when the system starts up. Write below command to execute.
sudo systemctl enable kubelet.service

sudo systemctl enable containerd.service
Step 15: Configure Worker Nodes 2
- Please follow the same instruction to configure Node 2, except update the IP address to 192.168.233.12 and Host name to mh-n2
Step 16: Join the Node to the Cluster
As we have already configured Master and worker nodes, now is the time to connect Nodes with cluster. We going to need both bootstrap token and also the CA Cert hash to join nodes with cluster. We can copy these information from the output of kubeadm init. Bootstrap token is a timed ticket and it has 24 hours lifecyle which means a new token need to be generate after 24 hours.
- Login into Master Node and write below command to check if any token is active or not.
sudo kubeadm token list
As we can see, we did not get any result because we don’t have any created token or token has been timed out or expired. In your case, you might get a token if you check after kubeadm init process.
- Now we are going to generate a new token with below command.
kubeadm token create
Output:
w8fovt.svvzo8jntyrdqzph
We can see that a new token has been created. If you check token list now, a new token will be found on the list.
kubeadm token list
- We can find CA Cert Hash on the Control Plane Node with below command.
openssl x509 -pubkey -in /etc/kubernetes/pki/ca.crt | openssl rsa -pubin -outform der 2>/dev/null | openssl dgst -sha256 -hex | sed 's/^.* //'
Output:
318fba0270967d24200c9eaf21857a7d90bce44a857aa8ea397337e8afe7c18d
Now we can take all of these information and make the join command with kubeadm joins by specifying the bootstrap token and CA Cert Hash but there is another way to connect nodes with cluster. We are going to join nodes with cluster with command.
- We can also use print-join-command to generate token and print the join command in the proper format. Write below command and generate the join command.
kubeadm token create --print-join-command
Output:
kubeadm join 192.168.233.10:6443 --token xgsdjp.1u45r4zhk6uhuv43 --discovery-token-ca-cert-hash sha256:318fba0270967d24200c9eaf21857a7d90bce44a857aa8ea397337e8afe7c18d
We can see above well-formatted join command with the proper parameters and values including the location of the API Server, the Bootstrap token and CA Cert Hash.
Now we are going to copy the above generated command and going to use this command on Worker nodes to connect with cluster.
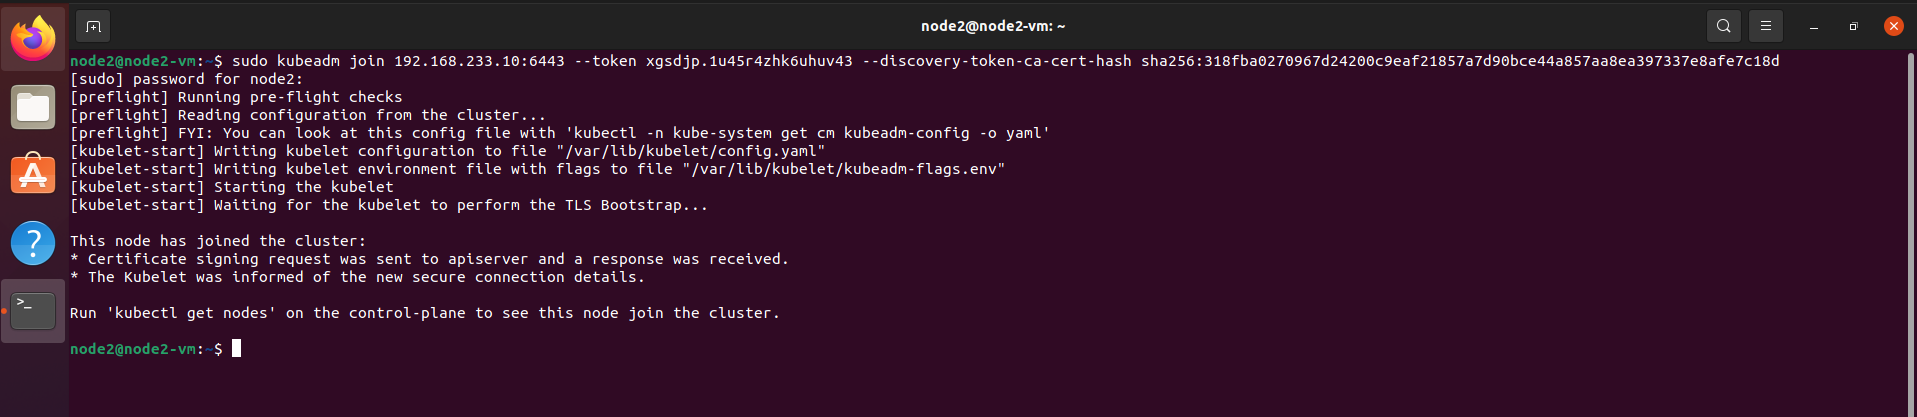
- Login into Node1 and use previously generated command from master node. In my case, generated command is below which I am going to use in Node1 and Node2.
sudo kubeadm join 192.168.233.10:6443 –token xgsdjp.1u45r4zhk6uhuv43 –discovery-token-ca-cert-hash sha256:318fba0270967d24200c9eaf21857a7d90bce44a857aa8ea397337e8afe7c18d
***Note: Above command will be different in your case. Use your generated command instead of using above command.
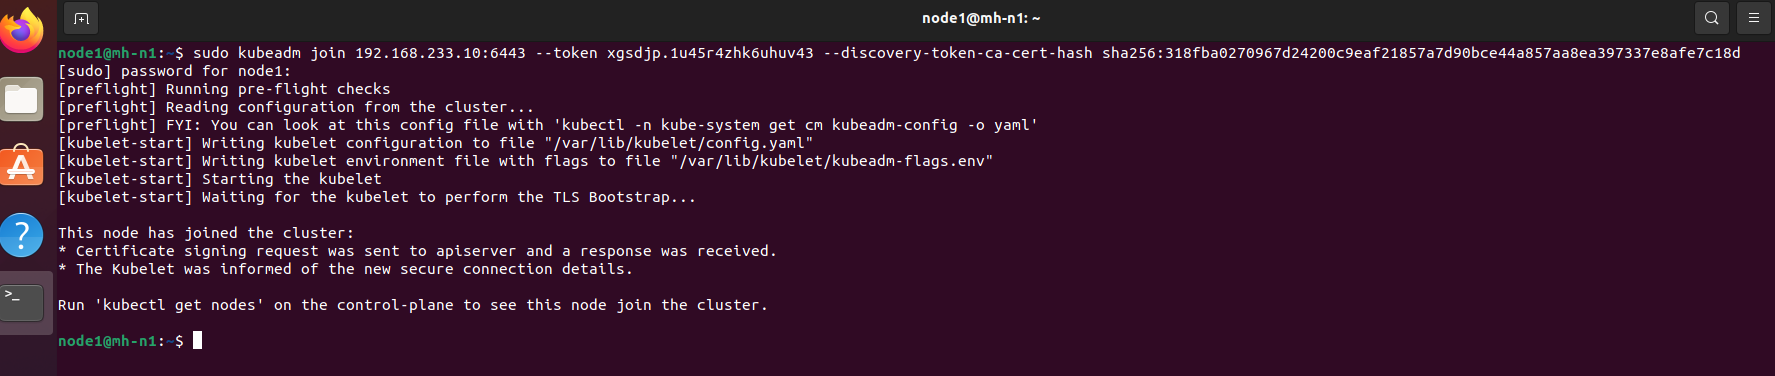
On the above output we can see, it executes the preflight checks first and then wait for the kubelet to perform the TLS Bootstrap process. We can also see from the bottom output that the node has been joined to the cluster. We have use the same command on Node 2, in my case mh-n2.
- Login back to Control Plane or Master Node, write below command to verify all connected nodes.
kubectl get nodes
Output:
NAME        STATUS   ROLES                  AGE     VERSION
mh-master   Ready    control-plane,master   31h     v1.21.0
mh-n1       Ready    <none>                 2m47s   v1.21.0
mh-n2       Ready    <none>                 92s     v1.21.0
***Note: Above output might say Not Ready until the networking pod is created on the new node. From the above output we can see both nodes are connected on the cluster and status is ready.
- On the Control Plane Node, watch for the calico pod and the kube-proxy to change to Running on the newly added nodes by below command.
kubectl get pods --all-namespaces --watch
Step 17: Deploying the Dashboard UI
Dashboard is a web-based Kubernetes user interface which we can use to deploy containerized applications to a Kubernetes cluster, troubleshoot the containerized application, and manage the cluster resources. Dashboard also provides information on the state of Kubernetes resources in the cluster and on any errors that may have occurred.
- The Dashboard UI is not deployed by default. To deploy it, run the following command on master node.
kubectl apply -f https://raw.githubusercontent.com/kubernetes/dashboard/v2.3.1/aio/deploy/recommended.yaml
Output:
namespace/kubernetes-dashboard created
serviceaccount/kubernetes-dashboard created
service/kubernetes-dashboard created
secret/kubernetes-dashboard-certs created
secret/kubernetes-dashboard-csrf created
secret/kubernetes-dashboard-key-holder created
configmap/kubernetes-dashboard-settings created
role.rbac.authorization.k8s.io/kubernetes-dashboard created
clusterrole.rbac.authorization.k8s.io/kubernetes-dashboard created
rolebinding.rbac.authorization.k8s.io/kubernetes-dashboard created
clusterrolebinding.rbac.authorization.k8s.io/kubernetes-dashboard created
deployment.apps/kubernetes-dashboard created
service/dashboard-metrics-scraper created
deployment.apps/dashboard-metrics-scraper created
- Let’s check the namespaces with below command.
kubectl get ns
Output:
NAME                   STATUS   AGE
default                Active   47h
kube-node-lease        Active   47h
kube-public            Active   47h
kube-system            Active   47h
kubernetes-dashboard   Active   79s
On the above output, we can see a new namesapce - kubernetes-dashboard in the list.
- Now is the time to check if any pods are running on newly created namespaces with below command.
kubectl -n kubernetes-dashboard get pods -o wide
Output:
NAME                                         READY   STATUS    RESTARTS   AGE     IP               NODE    NOMINATED NODE   READINESS GATES
dashboard-metrics-scraper-856586f554-dvmvg   1/1     Running   0          3m59s   172.16.191.193   mh-n1   <none>           <none>
kubernetes-dashboard-67484c44f6-sbgbf        1/1     Running   0          3m59s   172.16.96.129    mh-n2   <none>           <none>
We can see that two pods are running within above namespace.
- Check the service type with below command.
kubectl -n kubernetes-dashboard get svc
Output:
NAME                        TYPE        CLUSTER-IP       EXTERNAL-IP   PORT(S)    AGE
dashboard-metrics-scraper   ClusterIP   10.111.160.160   <none>        8000/TCP   5m58s
kubernetes-dashboard        ClusterIP   10.101.169.107   <none>        443/TCP    5m59s
Default service type is ClusterIP and it cannot be access from outside the cluster. We don’t need to modify Service file because we are not going to expose the cluster to the outside world.
-
Create a file and name the file dashboard-adminuser.yaml with below command. cat > dashboard-adminuser.yaml
-
Copy and paste following code on dashboard-adminuser.yaml file.
apiVersion: v1
kind: Namespace
metadata:
  name: kubernetes-dashboard
---
apiVersion: v1
kind: ServiceAccount
metadata:
  name: admin-user
  namespace: kubernetes-dashboard
---
apiVersion: rbac.authorization.k8s.io/v1
kind: ClusterRoleBinding
metadata:
  name: admin-user
roleRef:
  apiGroup: rbac.authorization.k8s.io
  kind: ClusterRole
  name: cluster-admin
subjects:
- kind: ServiceAccount
  name: admin-user
  namespace: kubernetes-dashboard

```ps

Note: Ctrl + C to exit

* You can check the pasted code on dashboard-adminuser.yaml file using following command.

```ps
sudo nano dashboard-adminuser.yaml
- As we are using new cluster binding so we need to delete the existing Cluster Binding section from kubernetes-dashboard file, otherwise an error will return. Use below command to delete.
kubectl delete clusterrolebinding kubernetes-dashboard
- Now we are going to execute newly created file with below command.
kubectl apply -f dashboard-adminuser.yaml
Output:
namespace/kubernetes-dashboard unchanged
serviceaccount/admin-user created
clusterrolebinding.rbac.authorization.k8s.io/admin-user created
- Now we need to find token we can use to log in. Execute following command:
kubectl -n kubernetes-dashboard get secret $(kubectl -n kubernetes-dashboard get sa/admin-user -o jsonpath="{.secrets[0].name}") -o go-template=""

From the above output we can see a new token has been generated, we can copy the above output token to login into dashboard.
- Use following command to enable the access to the Dashboard using the kubectl command-line tool.
kubectl proxy
Output:
Starting to serve on 127.0.0.1:8001
- Use below URL to access the dashboard.
http://localhost:8001/api/v1/namespaces/kubernetes-dashboard/services/https:kubernetes-dashboard:/proxy/
- Use above created token and click sign in button.
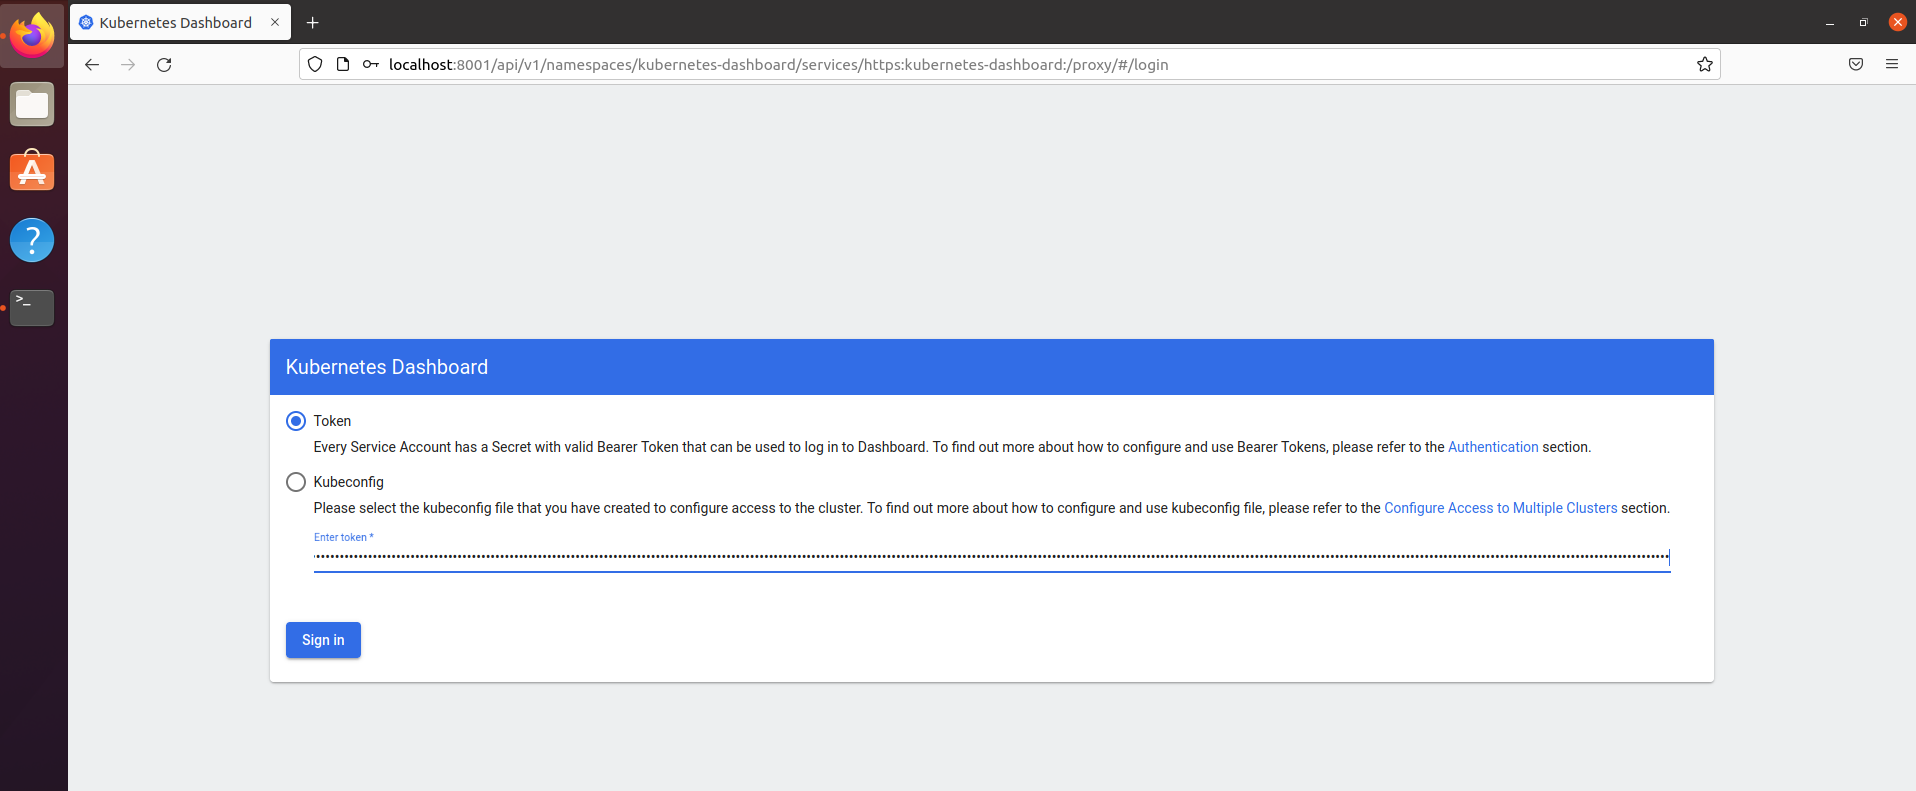
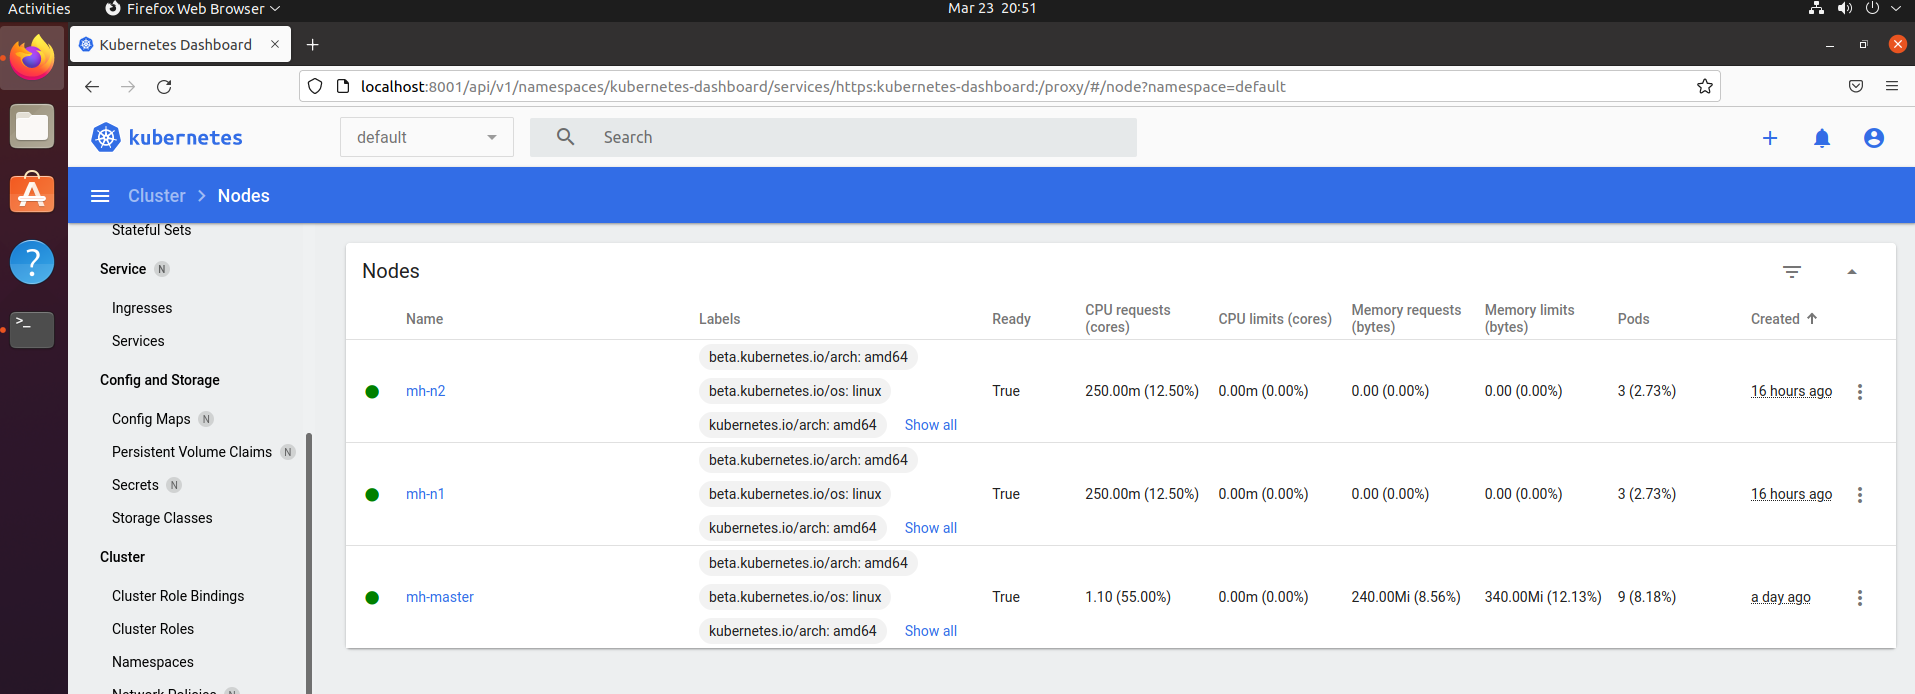
Workload section will show empty because we have not deployed any containerized pod yet. You can click cluster tab on left pane and will find list of cluster roles, Namespaces, Nodes and Storage Classes. You will find two nodes in the list of Nodes.
Deploy an asp.net core application in a pod to the target node
Step 18: Assign level to the nodes
Now we are going to deploy a containerized pod to target node. Before we assign the pod we are going to set a label for node.
- Check current label of nodes with below command in master node terminal.
kubectl get nodes --show-labels
Output:
NAME        STATUS   ROLES                  AGE     VERSION   LABELS
mh-master   Ready    control-plane,master   2d10h   v1.21.0   beta.kubernetes.io/arch=amd64,beta.kubernetes.io/os=linux,kubernetes.io/arch=amd64,kubernetes.io/hostname=mh-master,kubernetes.io/os=linux,node-role.kubernetes.io/control-plane=,node-role.kubernetes.io/master=,node.kubernetes.io/exclude-from-external-load-balancers=
mh-n1       Ready    <none>                 27h     v1.21.0   beta.kubernetes.io/arch=amd64,beta.kubernetes.io/os=linux,kubernetes.io/arch=amd64,kubernetes.io/hostname=mh-n1,kubernetes.io/os=linux
mh-n2       Ready    <none>                 27h     v1.21.0   beta.kubernetes.io/arch=amd64,beta.kubernetes.io/os=linux,kubernetes.io/arch=amd64,kubernetes.io/hostname=mh-n2,kubernetes.io/os=linux
- Now we are going to set custom label for nodes. I have decided to set the label for mh-n1 will be env=dev and mh-n2 will be env=prod. Use below commands to set labels for nodes.
kubectl label nodes mh-n1 env=dev
kubectl label nodes mh-n2 env=prod
- We can recheck label name again with below command.
kubectl get nodes --show-labels
Output:
NAME        STATUS   ROLES                  AGE     VERSION   LABELS
mh-master   Ready    control-plane,master   2d10h   v1.21.0   beta.kubernetes.io/arch=amd64,beta.kubernetes.io/os=linux,kubernetes.io/arch=amd64,kubernetes.io/hostname=mh-master,kubernetes.io/os=linux,node-role.kubernetes.io/control-plane=,node-role.kubernetes.io/master=,node.kubernetes.io/exclude-from-external-load-balancers=
mh-n1       Ready    <none>                 27h     v1.21.0   beta.kubernetes.io/arch=amd64,beta.kubernetes.io/os=linux,env=dev,kubernetes.io/arch=amd64,kubernetes.io/hostname=mh-n1,kubernetes.io/os=linux
mh-n2       Ready    <none>                 27h     v1.21.0   beta.kubernetes.io/arch=amd64,beta.kubernetes.io/os=linux,env=prod,kubernetes.io/arch=amd64,kubernetes.io/hostname=mh-n2,kubernetes.io/os=linux
Step 19: Deploying Resources Declaratively
Now we are going to deploy pod declaratively with YAML file.
- We are going to use dry-run=client to create a yaml manifest file for deployment with a container image. We could write the yaml by hand, but we can use dry-run=client to build it for us. Write below command to generate yaml manifest file.
kubectl create deployment hrm \
     --image=docker.io/mahedee/hrm:1.0.1 \
     --dry-run=client -o yaml | more
Output:
apiVersion: apps/v1
kind: Deployment
metadata:
  creationTimestamp: null
  labels:
    app: hrm
  name: hrm
spec:
  replicas: 1
  selector:
    matchLabels:
      app: hrm
  strategy: {}
  template:
    metadata:
      creationTimestamp: null
      labels:
        app: hrm
    spec:
      containers:
      - image: docker.io/mahedee/hrm:1.0.1
        name: hrm
        resources: {}
status: {}
- Let’s write this deployment yaml out to file. We are now redirecting previously generated output to deployment.yaml file.
kubectl create deployment hrm \
     --image=docker.io/mahedee/hrm:1.0.1 \
     --dry-run=client -o yaml > deployment.yaml
- Edit deployment.yaml file to set a node label. Use below command to edit the file.
sudo nano deployment.yaml
- Update the file with below text.
piVersion: apps/v1
kind: Deployment
metadata:
  creationTimestamp: null
  labels:
    app: hrm
  name: hrm
spec:
  replicas: 1
  selector:
    matchLabels:
      app: hrm
  strategy: {}
  template:
    metadata:
      creationTimestamp: null
      labels:
        app: hrm
    spec:
      containers:
      - image: docker.io/mahedee/hrm:1.0.1
        name: hrm
        ports:
        - containerPort: 8011
        resources: {}
status: {}
- Use below command to execute the deployment.yaml manifest file.
kubectl apply -f deployment.yaml
Output:
deployment.apps/hrm created
- Now generate the yaml for the service with below command.
kubectl expose deployment hrm \
     --port=80 --target-port=8011 \
     --dry-run=client -o yaml | more
- Write the service yaml manifest to a file. Target port is 8011. Because image internal port is 8011
kubectl expose deployment hrm
–port=80 –target-port=8011
–dry-run=client -o yaml > service.yaml
- Modify the service using the following command.
sudo nano service.yaml
piVersion: v1
kind: Service
metadata:
  creationTimestamp: null
  labels:
    app: hrm
  name: hrm
spec:
  type: NodePort
  ports:
  - port: 80
    protocol: TCP
    targetPort: 8011
  selector:
    app: hrm
status:
  loadBalancer: {}
-
Save and Exit
-
Use below command to execute the service yaml file declaratively.
kubectl apply -f service.yaml
Output:
service/hrm created
- Check out our current state, Deployment, ReplicaSet, Pod and a Service.
kubectl get pod -o wide
Output:
NAME                   READY   STATUS    RESTARTS   AGE   IP              NODE    NOMINATED NODE   READINESS GATES
hrm-697468d799-t48rb   1/1     Running   0          25m   172.16.96.133   mh-n2   <none>           <none>
In the above, we see pod is running on mh-n2 means node 2
kubectl get all -o wide
Output:
NAME                       READY   STATUS    RESTARTS   AGE   IP              NODE    NOMINATED NODE   READINESS GATES
pod/hrm-697468d799-t48rb   1/1     Running   0          27m   172.16.96.133   mh-n2   <none>           <none>

NAME                 TYPE        CLUSTER-IP      EXTERNAL-IP   PORT(S)        AGE    SELECTOR
service/hrm          NodePort    10.103.252.75   <none>        80:32614/TCP   24m    app=hrm
service/kubernetes   ClusterIP   10.96.0.1       <none>        443/TCP        5d4h   <none>

NAME                  READY   UP-TO-DATE   AVAILABLE   AGE   CONTAINERS   IMAGES                        SELECTOR
deployment.apps/hrm   1/1     1            1           27m   hrm          docker.io/mahedee/hrm:1.0.1   app=hrm

NAME                             DESIRED   CURRENT   READY   AGE   CONTAINERS   IMAGES                        SELECTOR
replicaset.apps/hrm-697468d799   1         1         1       27m   hrm          docker.io/mahedee/hrm:1.0.1   app=hrm,pod-template-hash=697468d799
We can see recent deployed pod and service from the above output and running without error. hrm pod has been deployed to mh-n2 node as per configuration of label. See first row.
- Kubectl create deployment we executed, it created a deployment for us. Let’s look more closely at that deployment.
kubectl get deployment hrm
Output:
NAME   READY   UP-TO-DATE   AVAILABLE   AGE
hrm    1/1     1            1           13m
- Deployments are made of ReplicaSets and ReplicaSets create Pods!
kubectl get replicaset
kubectl get pods
Output:
mh-master@mhmaster-virtual-machine:~$ kubectl get replicaset
NAME             DESIRED   CURRENT   READY   AGE
hrm-697468d799   1         1         1       29m
mh-master@mhmaster-virtual-machine:~$ kubectl get pods
NAME                   READY   STATUS    RESTARTS   AGE
hrm-697468d799-t48rb   1/1     Running   0          30m
- Check running service using the following command.
kubectl get svc
Output:
NAME         TYPE        CLUSTER-IP      EXTERNAL-IP   PORT(S)        AGE
hrm          NodePort    10.103.252.75   <none>        80:32614/TCP   27m
kubernetes   ClusterIP   10.96.0.1       <none>        443/TCP        5d5h
- Check service information using following command.
kubectl get svc hrm
Output:
NAME   TYPE       CLUSTER-IP      EXTERNAL-IP   PORT(S)        AGE
hrm    NodePort   10.103.252.75   <none>        80:32614/TCP   33m
- Acces the service inside the cluster using curl command.
curl http://10.103.252.75:80/swagger/index.html
- We can also get that information from using describe.
kubectl describe service hrm
Output:
Name:                     hrm
Namespace:                default
Labels:                   app=hrm
Annotations:              <none>
Selector:                 app=hrm
Type:                     NodePort
IP Family Policy:         SingleStack
IP Families:              IPv4
IP:                       10.103.252.75
IPs:                      10.103.252.75
Port:                     <unset>  80/TCP
TargetPort:               8011/TCP
NodePort:                 <unset>  32614/TCP
Endpoints:                172.16.96.133:8011
Session Affinity:         None
External Traffic Policy:  Cluster
Events:                   <none>
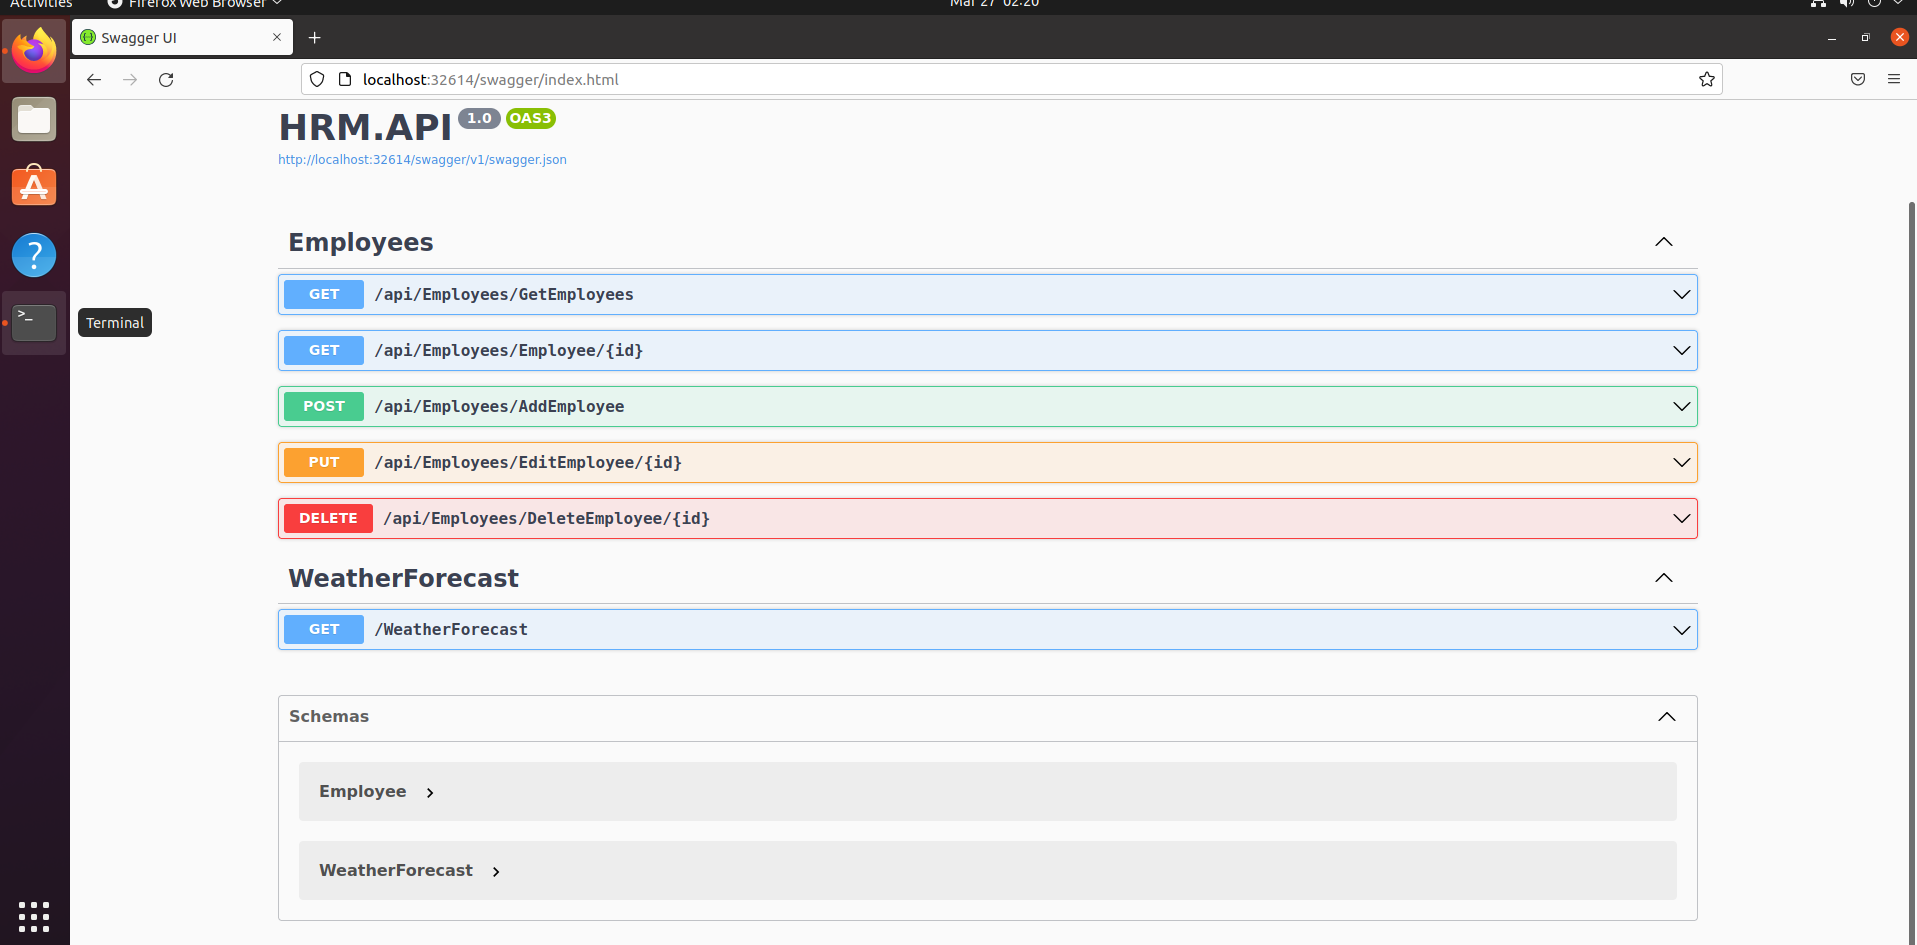
- Access the service using the following URL on the browser.
http://localhost:32614/swagger/index.html
Output:
Step 20: Verify with Dashboard UI
- Log back to dashboard UI to verify the current state. (Follow step -17)
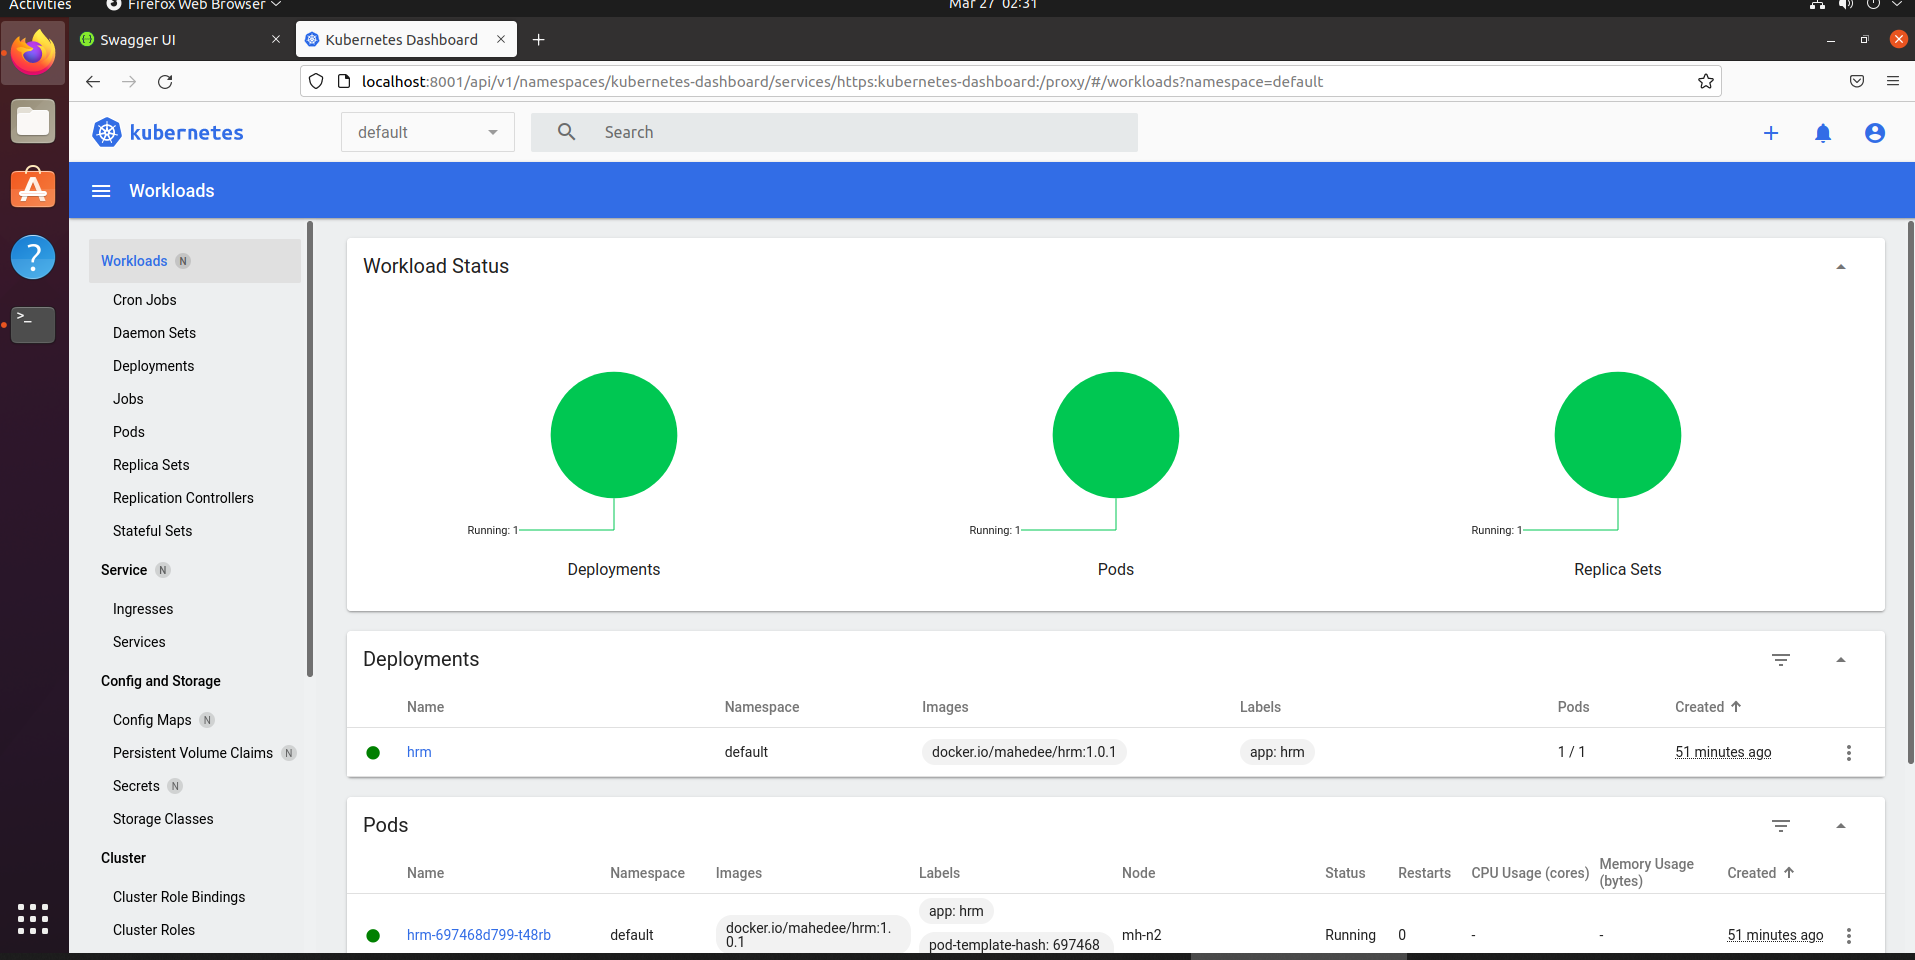

From the above image, I see pod is running on node 2 and everything running health.
Thanks for your long patients

Comments